
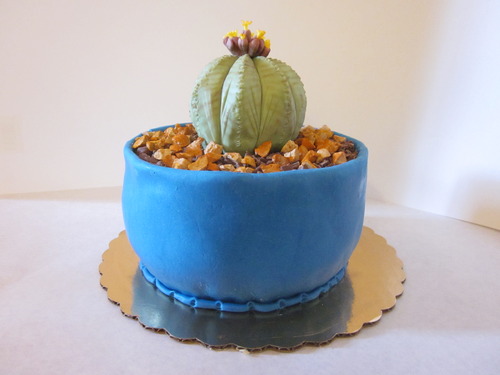
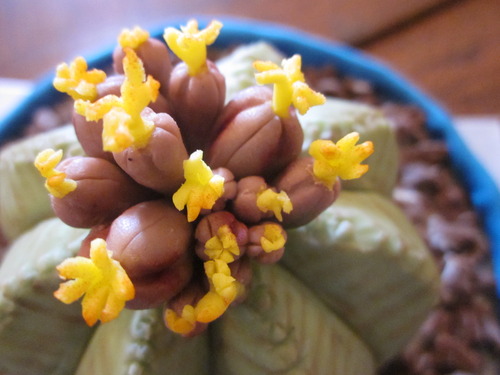
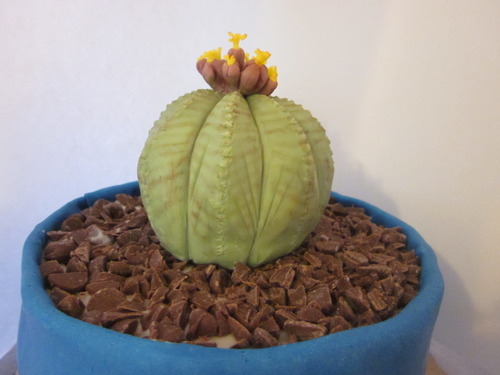
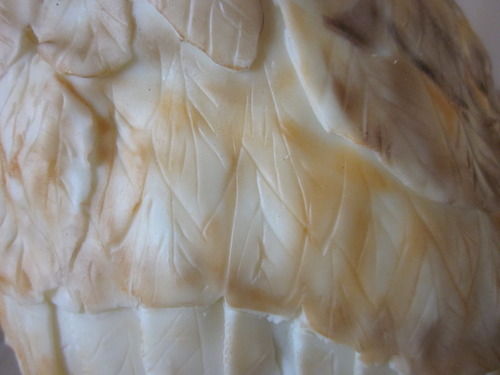
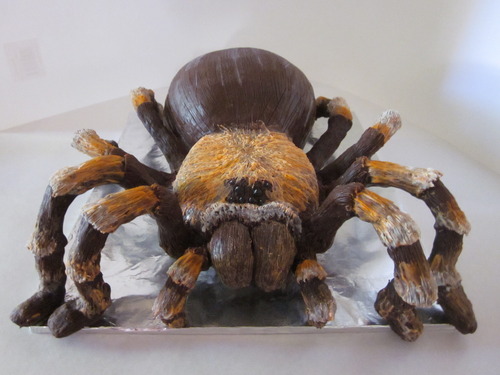
Now, what you’re looking at is a fine example of the species of succulent known as Euphorbia Obesa. Yes, it’s just prime example of it’s kind… er. Sort of. I mean, it might be, if it wasn’t a cake.
That’s right; I said cake.
What you see before you is an delicious, sugary, highly unusual looking construction of brown sugar/rum/Kahlua cake, butterscotch syrup, brown butter cream cheese frosting, rice crispies, marshmallow, chocolate chips, modeling chocolate, and gumpaste. In other words, it’s basically pure sugar and fat.
*Sighs dreamily*
Isn’t it wonderful?
It might be a rather unusual choice for a cake, but the circumstances in which it were made, and so were the people that it was for. My brother, who is obsessed plants, succulents in particular, works at a conservatory. Now, he has two bosses, both of whom are awesome. One of them, who shall henceforth be known as Mr. E, asked me to make a cake for the other boss, Mrs. M, since she’s kind of amazing, and it was her birthday. I did, but what I didn’t know was that it was his birthday two days later. Now, since it was during finals and I was taking organic chemistry, physics, history, and biology, I decided that it probably wasn’t the best idea to make him a cake when my sanity was already fraying at the edges and I had already made one cake, which was probably a horrible decision to start with.
The solution? Wait three weeks until my sanity had recovered (somewhat) and then randomly walk in with a surprise birthday cake. Because it just makes sense.
So, this was the result. A cake that looks like a succulent. And, yes, succulent, because it’s not a cactus, something that should apparently be known by all, according to my brother. He looked like a rather grumpy rabid baby owl-bear when I told him someone had called it a cactus. If that reference doesn’t make any sense, then google an owl-bear. And then squint and try to imagine it as a person. Kind of adorable, right? In a mutant sort of way. And now… Let us begin the creation!
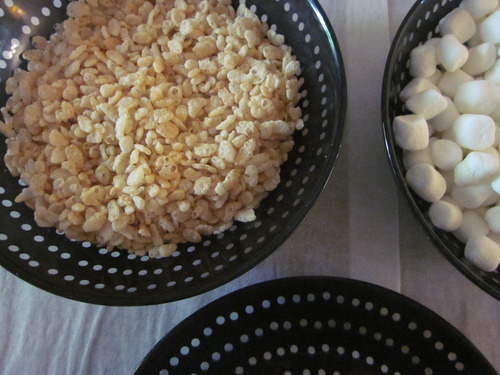
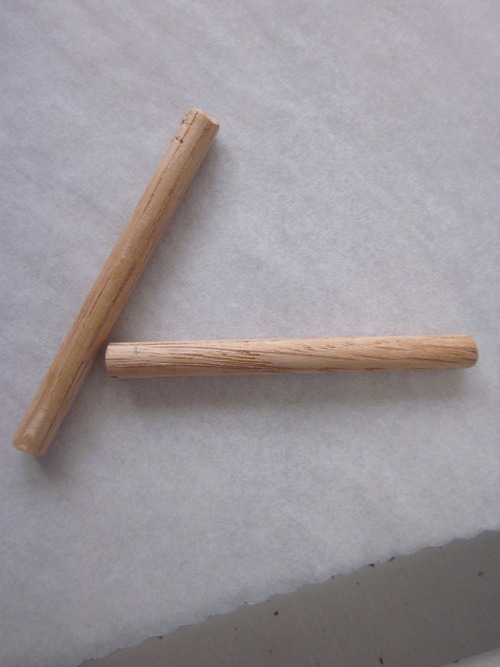
First, you need marshmallows and rice crispies and, of course, butter.
You only need enough butter to grease your hands thoroughly, though, and the amount of rice crispies and marshmallows you need will vary depending on how big you want to make your Euphorbia. That’s another great thing about this plant. There’s so much variation in it that even if your finished cake doesn’t look like that you meant for it to look, just scroll through google images, and you’ll probably find one that looks like yours.
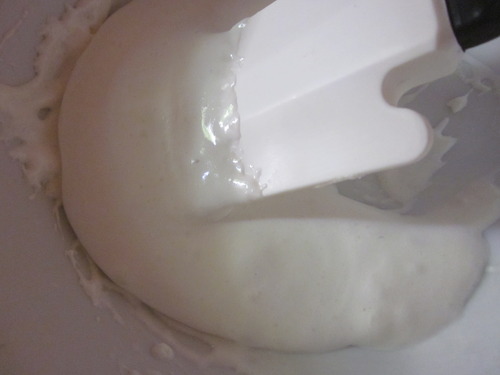
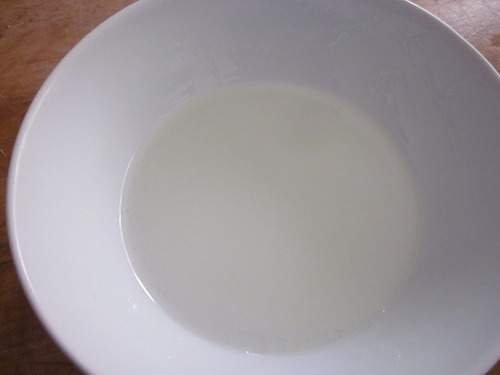
Melt the marshmallows in the microwave, stirring frequently, until they’ve completely melted into a pile of viscous, delicious goop. Make sure there’s no lumps of un-melted marshmallow. Then, add enough rice crispies to coat them all thoroughly.
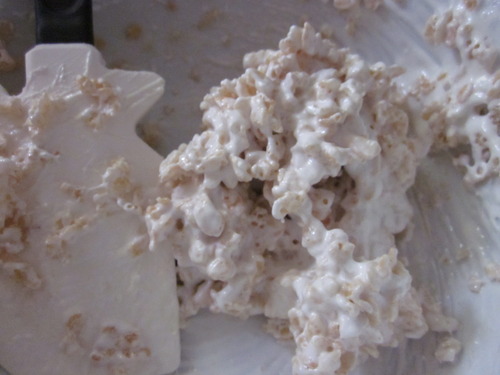
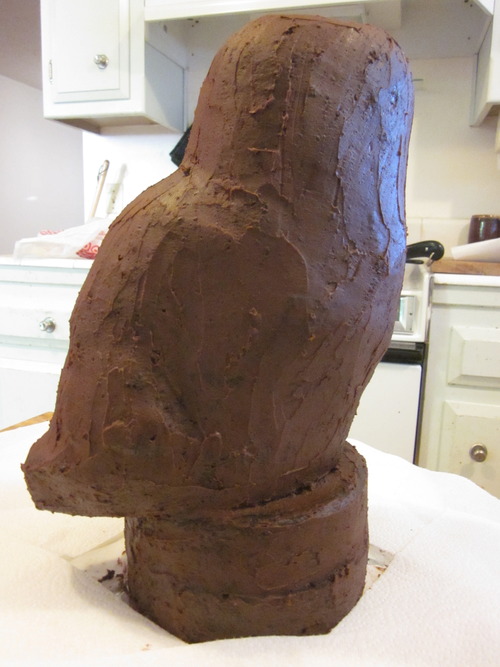
I, sadly, ran out of rice crispies, so this is a bit heavy on the marshmallow. Then, grease your hands with the butter, and grab a chunk of the rather unattractive looking mixture when it’s still warm, and mold it into a ball, pressing tightly. I made mine the side of a baseball, roughly. Set it aside to cool and solidify. If you have any left over marshmallow mixture… you can eat it, obviously. You know, since you don’t want to be wasteful or anything.
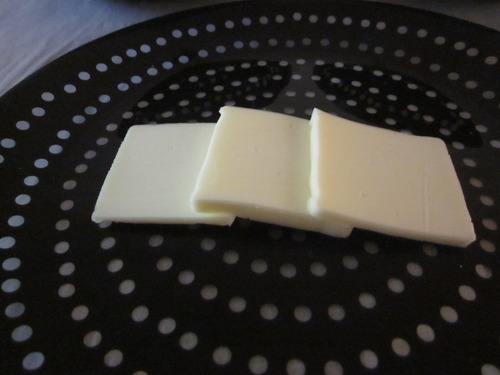
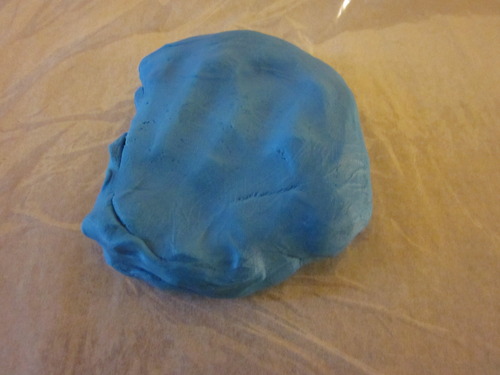
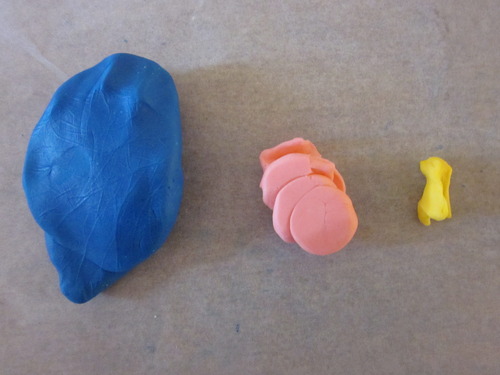
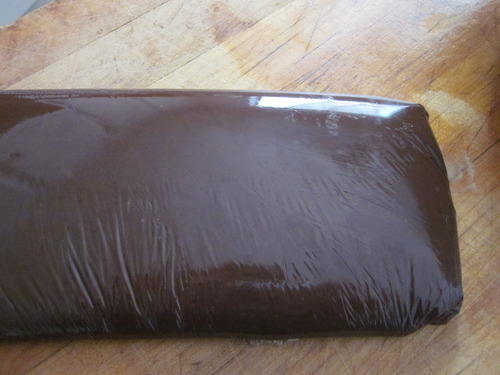
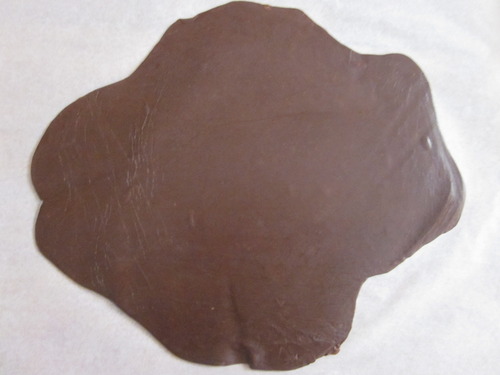
Next, you need to make modeling chocolate. It’s like sweet, chocolately clay.
Next, you need to make modeling chocolate. It’s like sweet, chocolately clay.
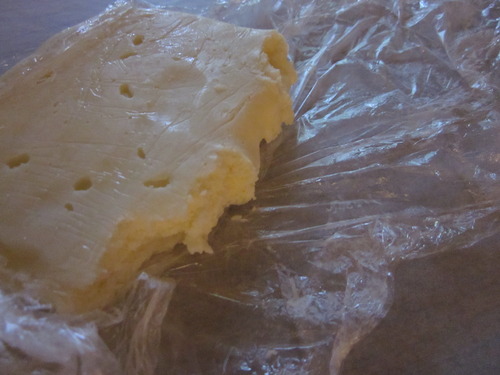
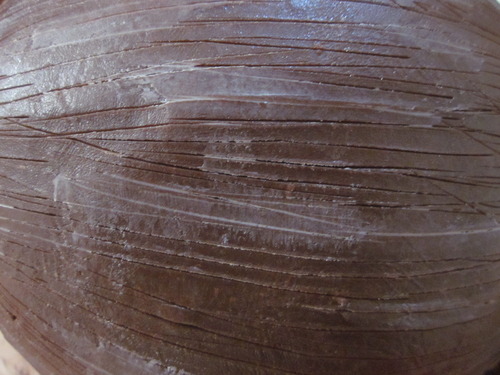
This is what it’s going to look like when it’s done, but then you need to knead it, just a little, until it’s soft and malleable. After that, tint it a pale green with food coloring for the base color of the succulent (not cactus).
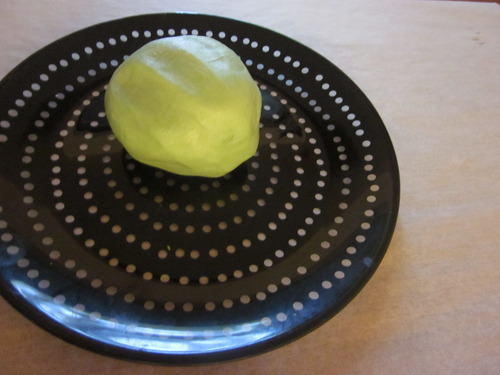
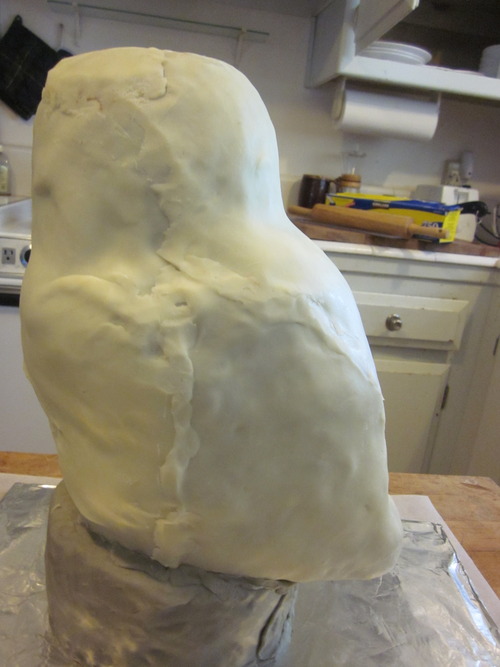
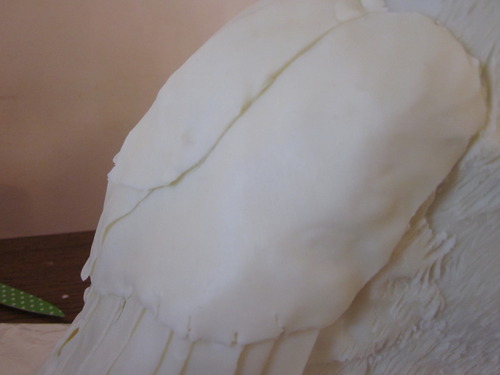
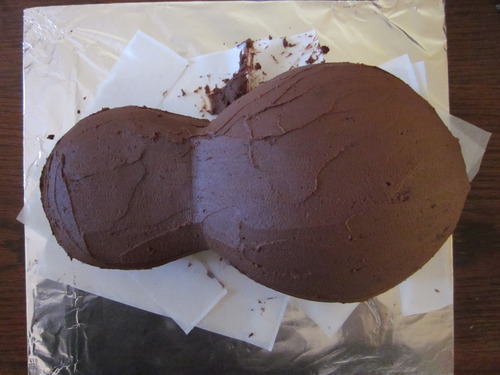
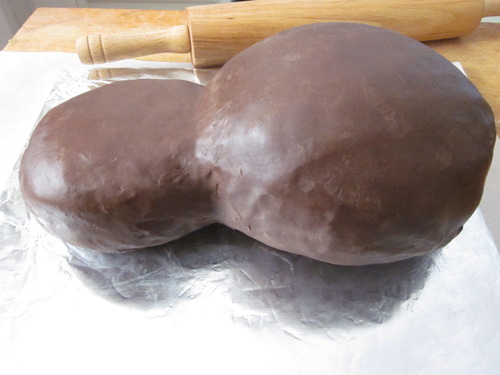
After that, roll it out, keeping it fairly thick, and lay it over the now firm ball of rice crispies and marshmallow, pressing it down onto the ball gently but firmly.
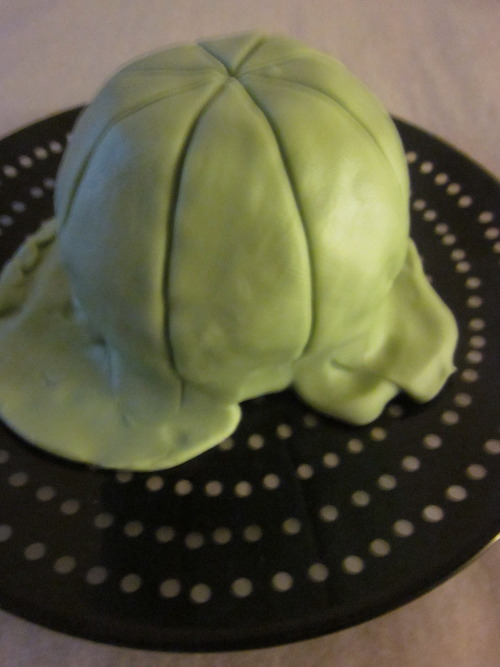
Please ignore the fact that it looks more like something from Alien and is about to pop open and attach itself to your face at any moment than something you want to eat. Create the marks by pretty the back of a knife into the modeling chocolate, making sure not to go through the chocolate layer.
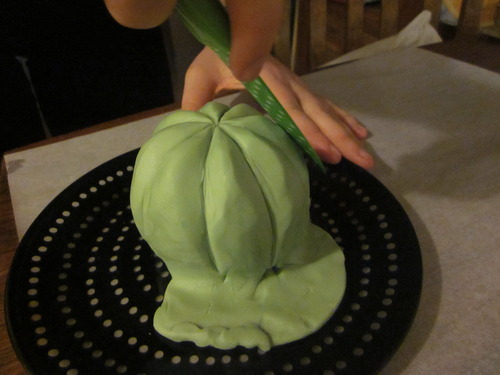
Next, use the flat side of a knife to shape the individual sections of the alien egg sack - I mean, plant.

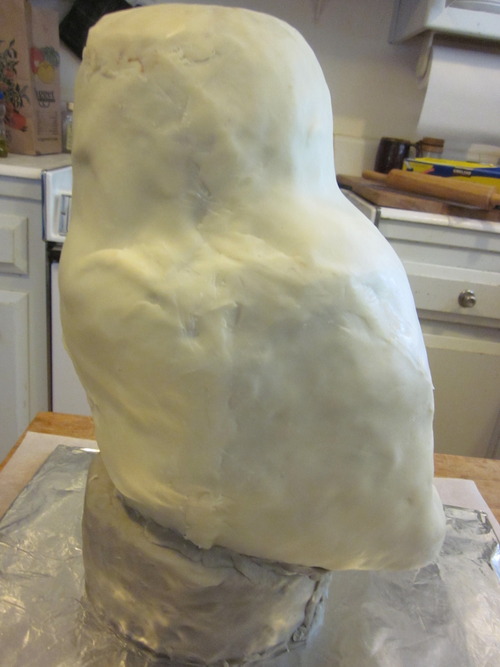
After much fiddling and pressing and after the bottom’s been trimmed off, it should look something like this… thing. I’m not actually sure what to liken it to. Any suggestions?
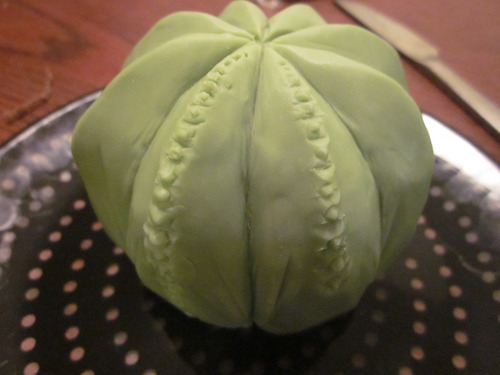
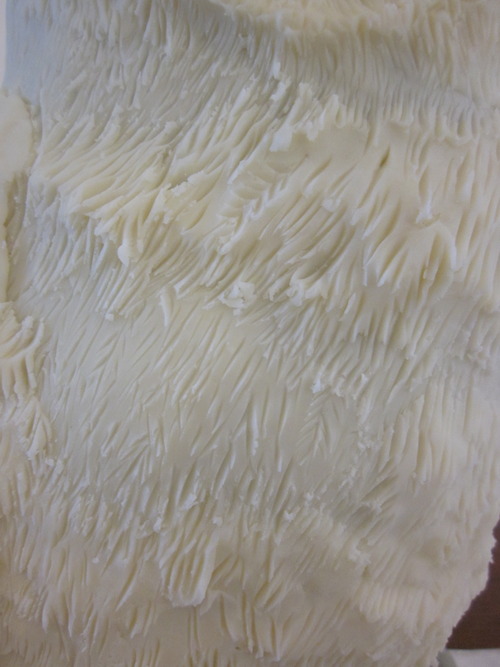
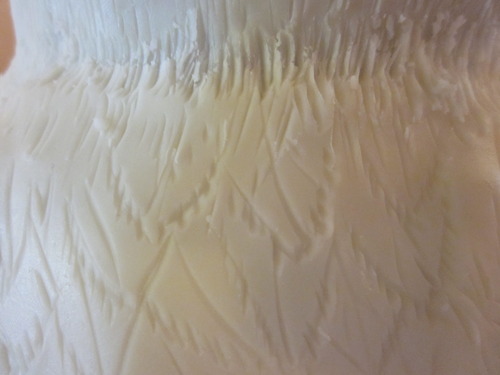
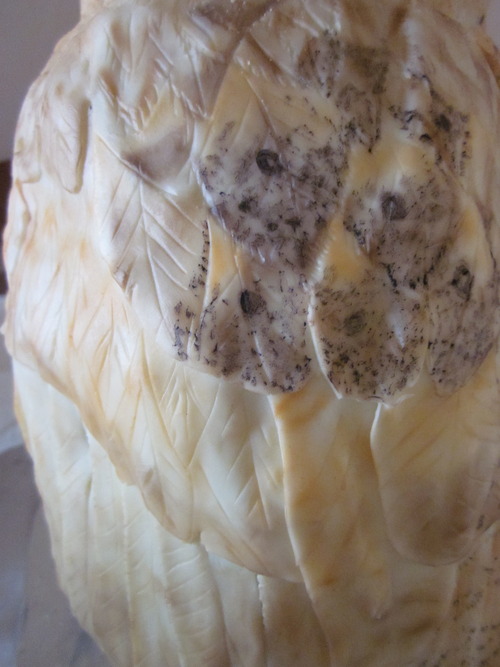
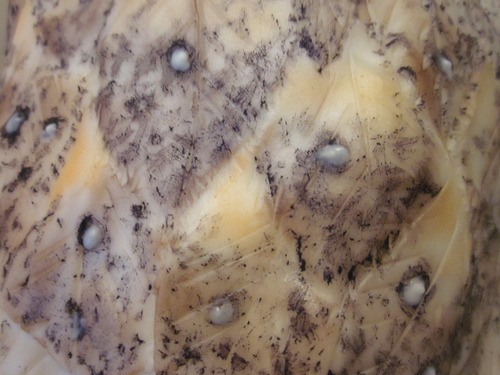
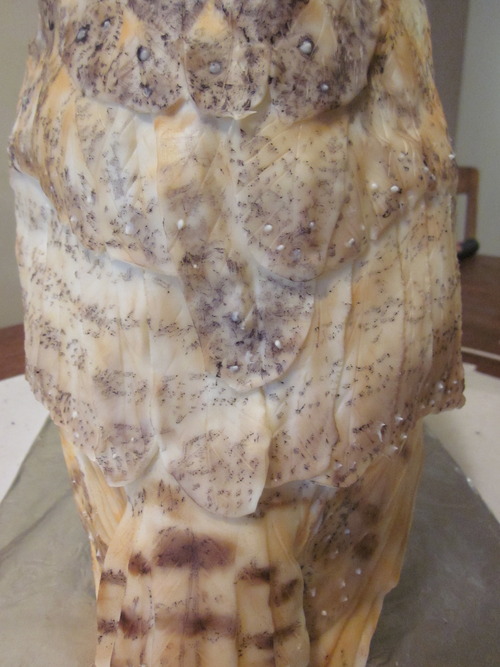
Anyway, after that, it needs little ridgy… bumpy things. Basically, you just need to spend far too much time with a pointy object molding the edge into bumps. I found it works best if the tool you’re using has a flat tip and to press it in and angle it downwards before messing about making the bump. And I just reread that last sentence. It sounds highly sketchy. After that, it just needs to be painted. I used food coloring powder to give it striations.
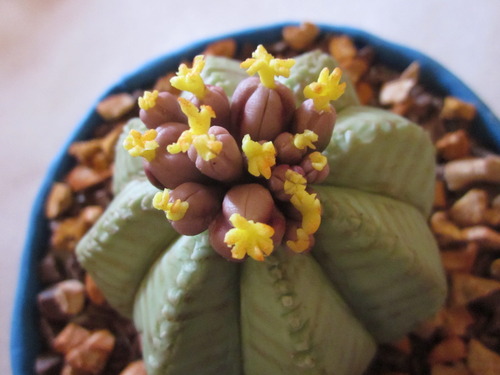
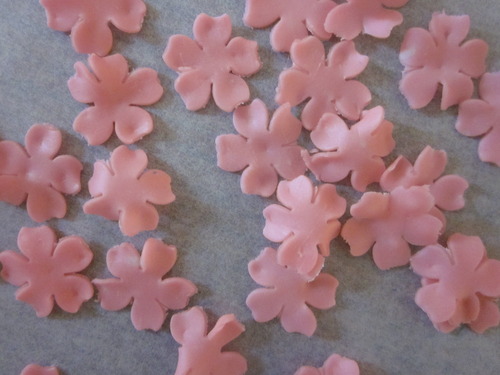
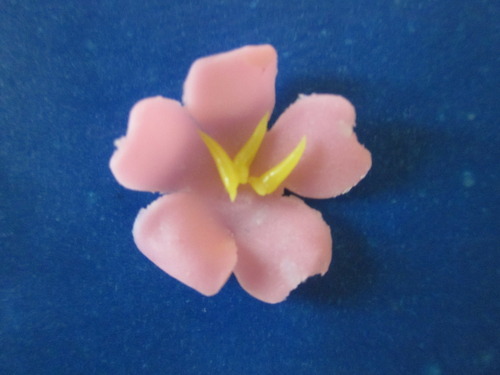
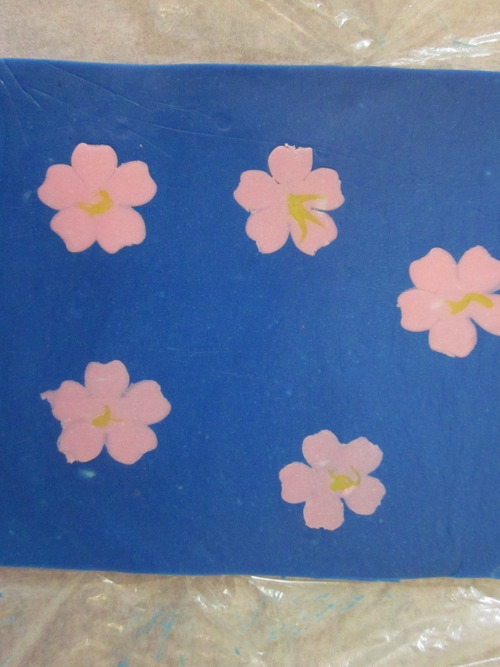
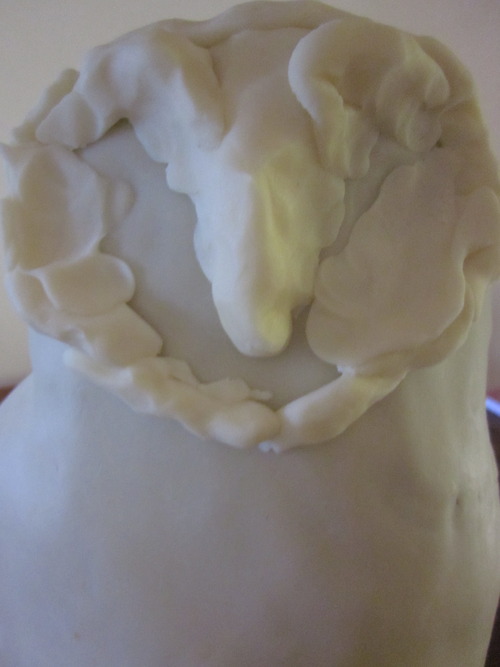
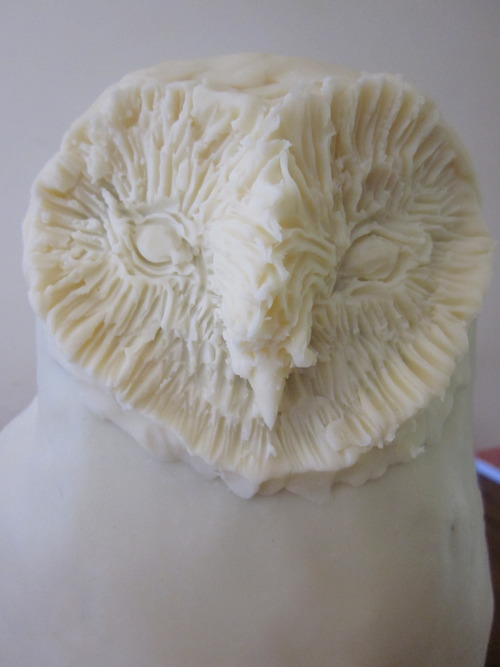
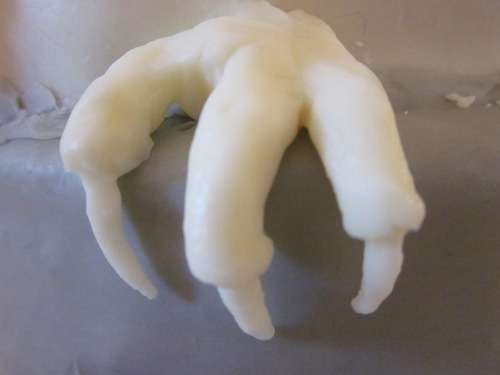
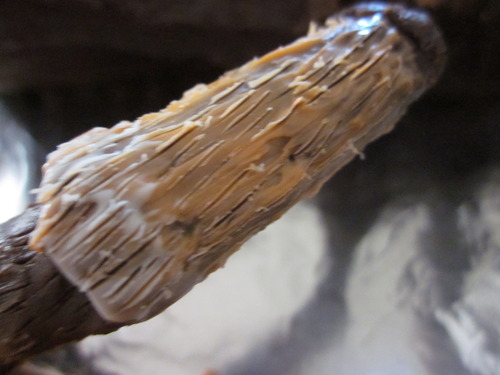
But, even after all of that fiddling and pressing and coloring, it’s still not done. Nope. Time for highly mutant looking flowers! Color some modeling chocolate and then pinch off a piece around the size of the flowers. Roll it so that it tapers to a point on one end, and then use something, the long side of a tooth pick will work, to make three indentations, and then, on each of the three parts, make a thin, light line with a knife. Then, poke a hole in the end. Like this.
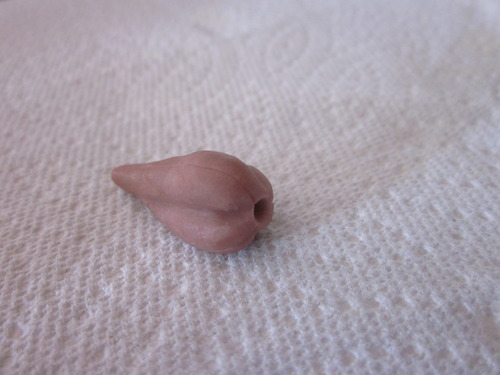
Next, I used some yellow modeling chocolate to make the stamens… or stigmas. I always get those confused. Like stalactites and stalagmites. Anyway, make them, and then shove the pointed end in the hole, making sure that it’s securely in there. And, if my brother was here, he’d be making a “that’s what she said” joke. But, since he’s not, we can all be mature adults about it… Hee hee. I made my stamen/stigmas tri-pronged, like the real flowers, so it turned out looking like this.
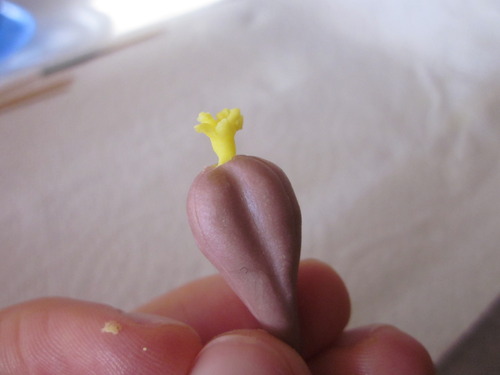
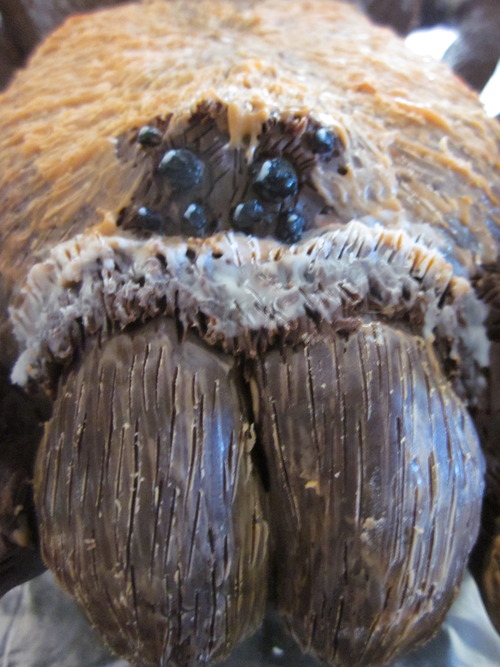
Repeat until you’ve got a bunch of them in varying sizes, and add in shading with powered colors.
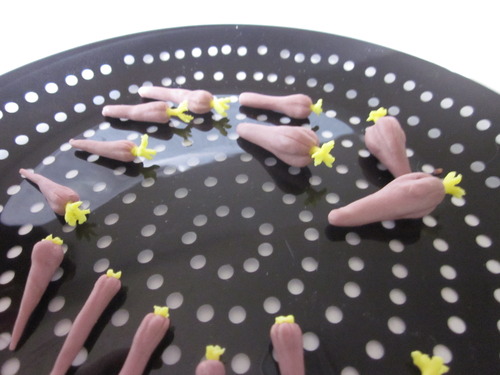
Once there’s enough, press the bases together firmly to make one flower cluster, and cut off the bottom so that it’s fairly flat before pressing it to the cake.
And then… it was time for the cake. I used one of my favorite cake recipes with just a few minor adjustments, like… doubling the alcohol by adding two teaspoons of Kahlua and a teaspoon of silver rum. This is also one of the only cakes that my brother loves, since he doesn’t really like sweets that much, another reason that I consider the fact he’s an alien.
http://www.marthastewart.com/356040/butterscotch-pecan-cake
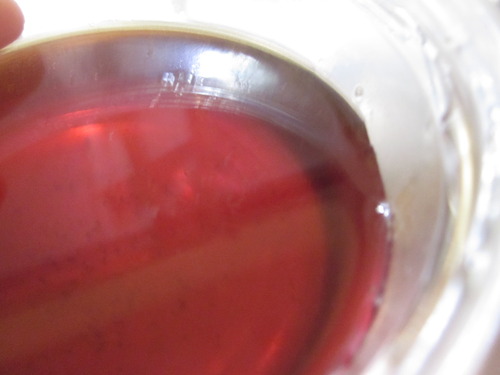
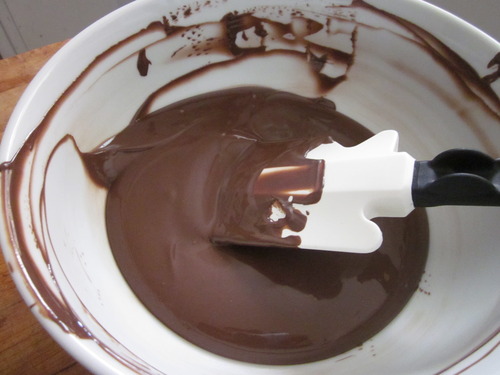
I used the cake part as well as the butterscotch syrup… which I totally didn’t eat with a spoon at any point in time… DON’T JUDGE ME!
I mean… ummm… Look! Cake!
http://www.marthastewart.com/356040/butterscotch-pecan-cake
I used the cake part as well as the butterscotch syrup… which I totally didn’t eat with a spoon at any point in time… DON’T JUDGE ME!
I mean… ummm… Look! Cake!
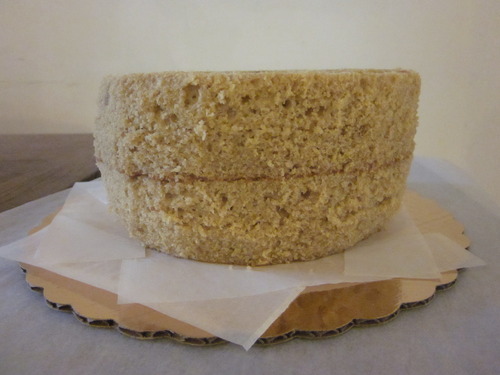
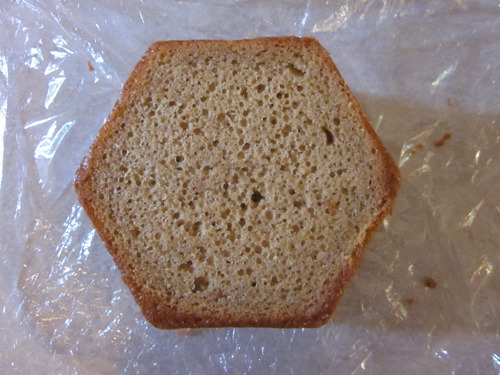
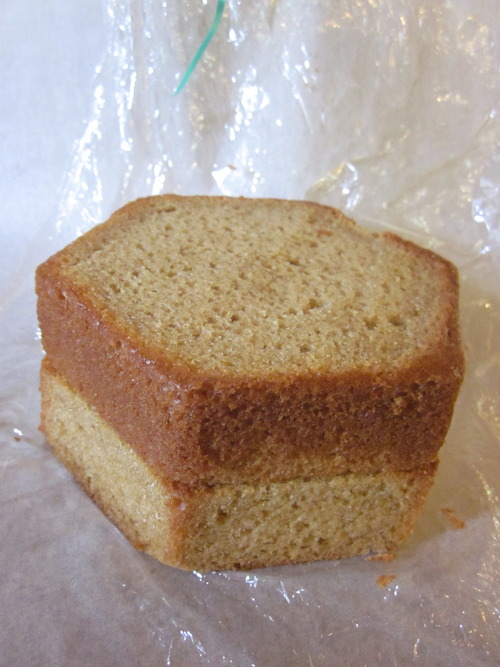
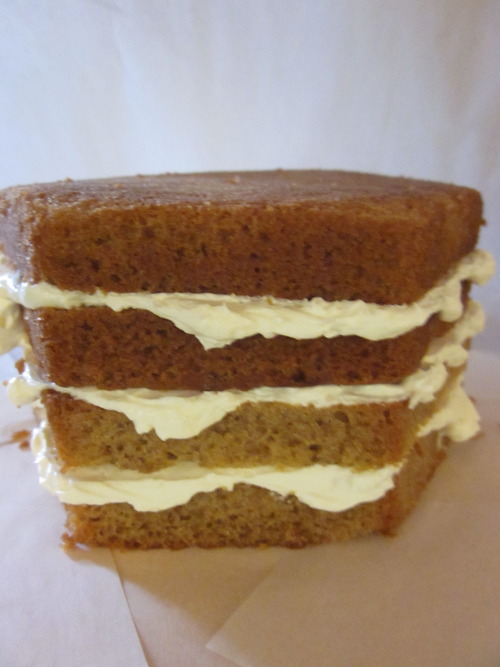
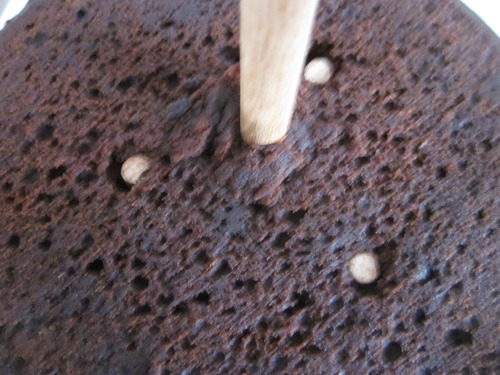
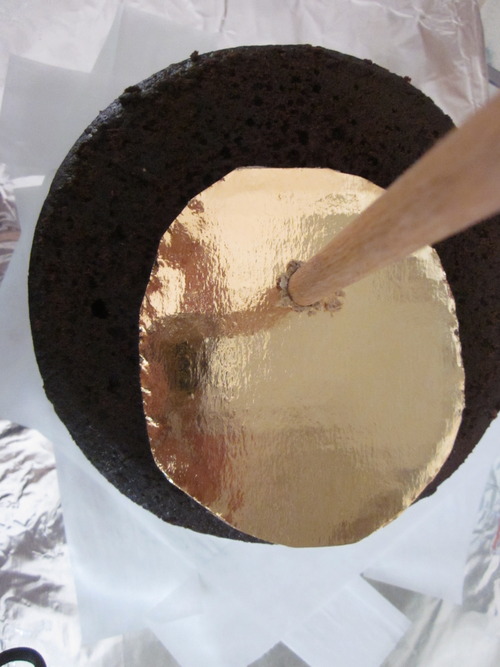
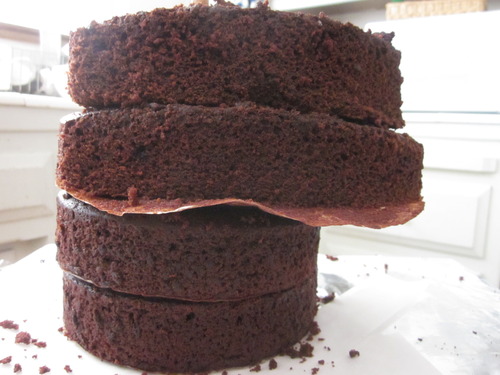
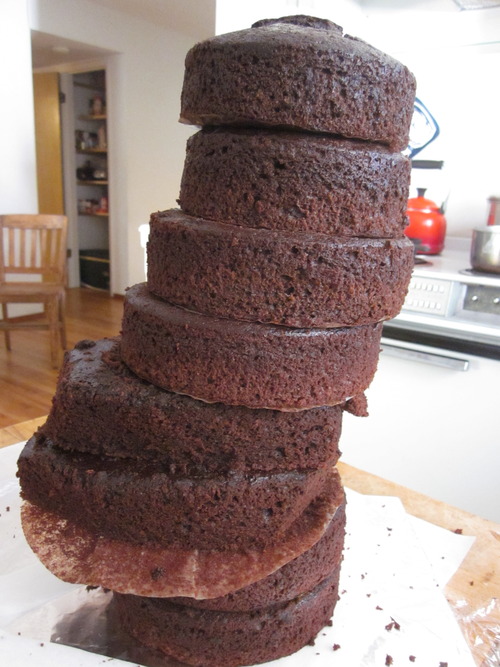
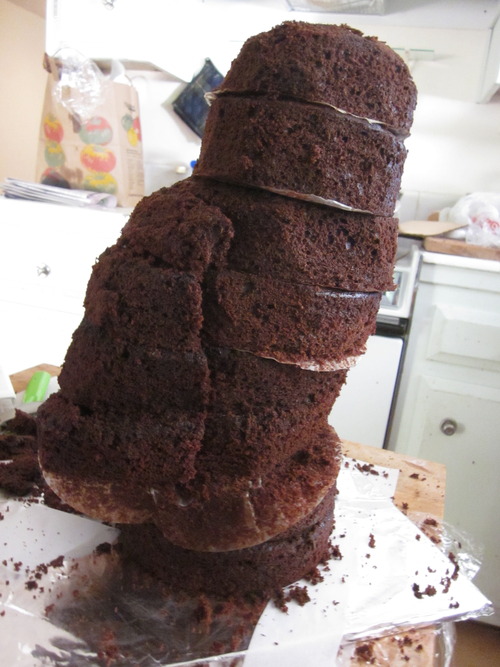
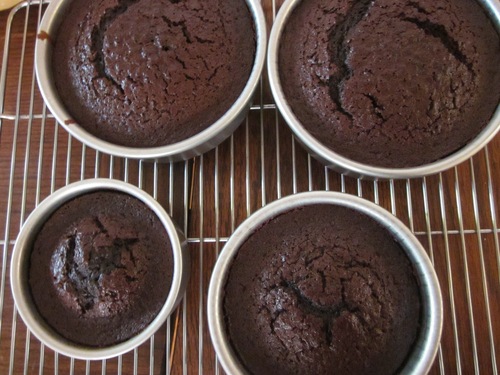
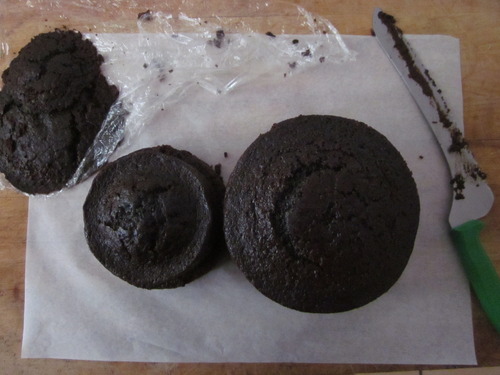
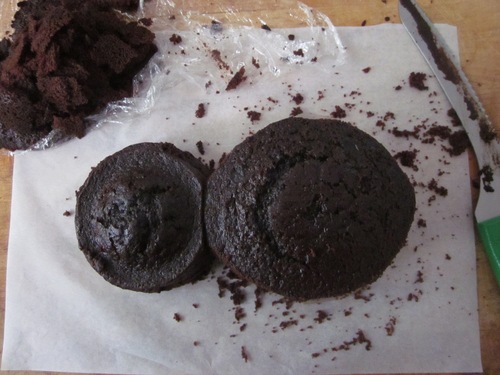
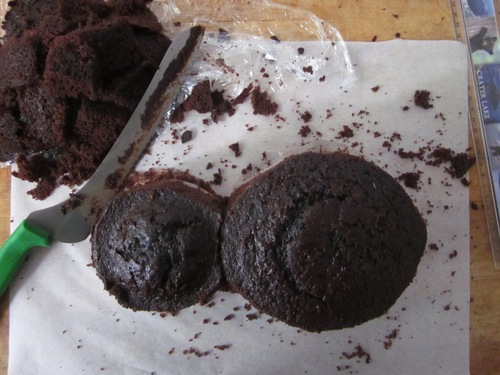
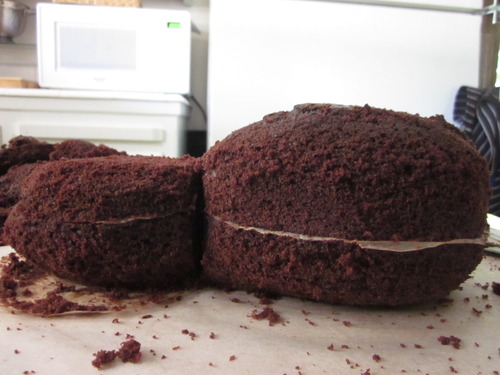
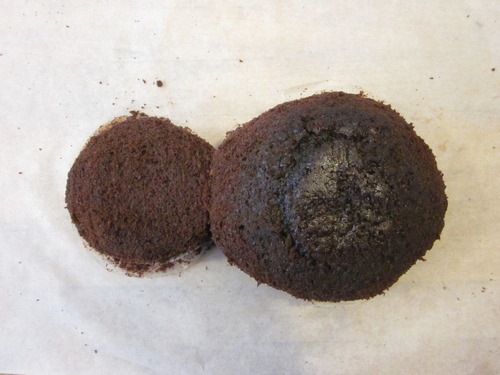
I just baked the cake in two eight inch pans, which did alter the baking time, making it take a bit longer, so I lowered the temperature fifteen degrees or so. It’s rather hard to tell on our oven, since it perpetually seems to cook 25 degrees too hot. Then, I just took some off of the sides, tapering it slightly towards the base to get a rounded, pot look. This is just the two cakes stacked on top of each other while I carved them. After getting it carved, I sliced each of the layers in half for a total of four layers before adding the sweet, wonderful goodness that is… butterscotch syrup.
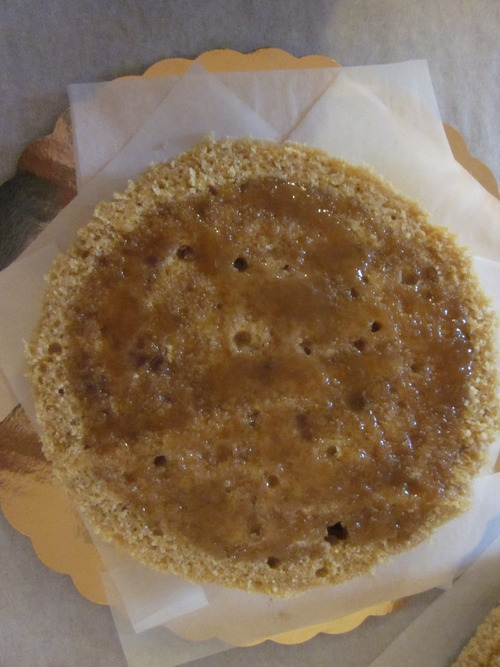
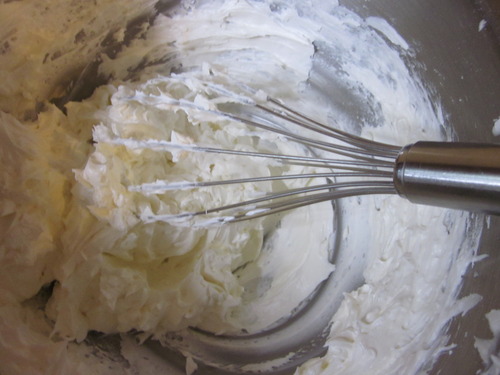
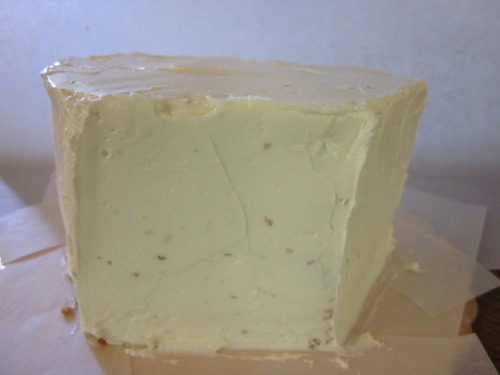
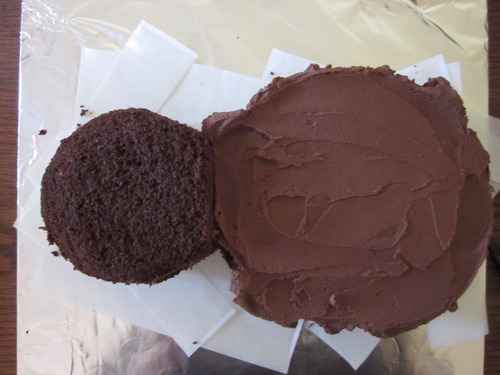
*sniff* Isn’t it one of the most beautiful things you’ve ever seen? On top of this, if you manage not to crack and eat it, put a thin layer of cream cheese icing, or the icing of your choice. Drizzle the syrup over the next layer of cake, and then put it drizzle side down onto your first layer, so it goes cake, syrup, icing, syrup, cake… Repeat until you have just placed the final piece on top. Don’t apply the syrup to the outside, but instead just cover the cake in icing. I don’t have picture of this step because, well… it really didn’t look appetizing.
Let’s move on to something prettier, shall we?
Let’s move on to something prettier, shall we?
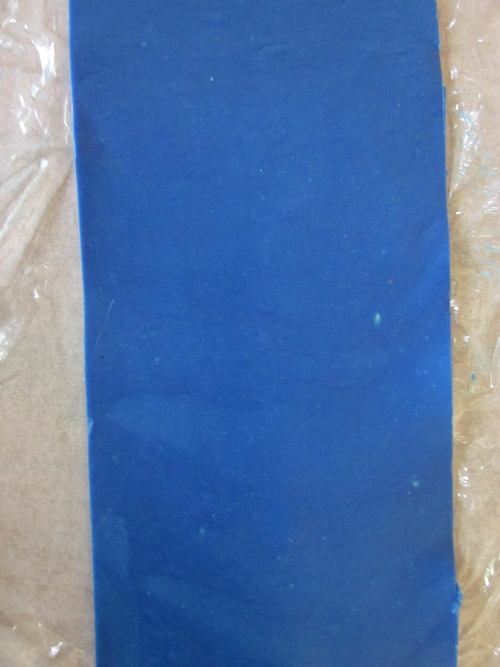
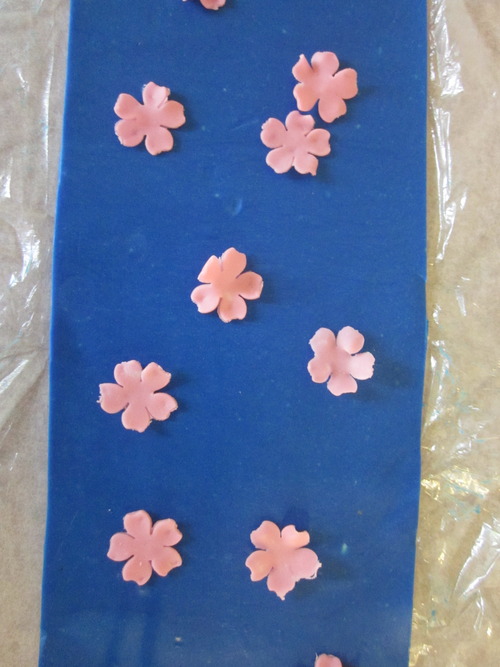
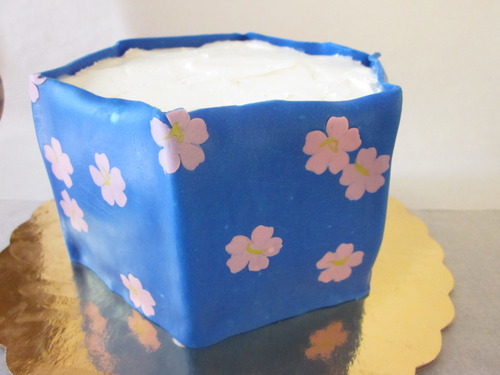
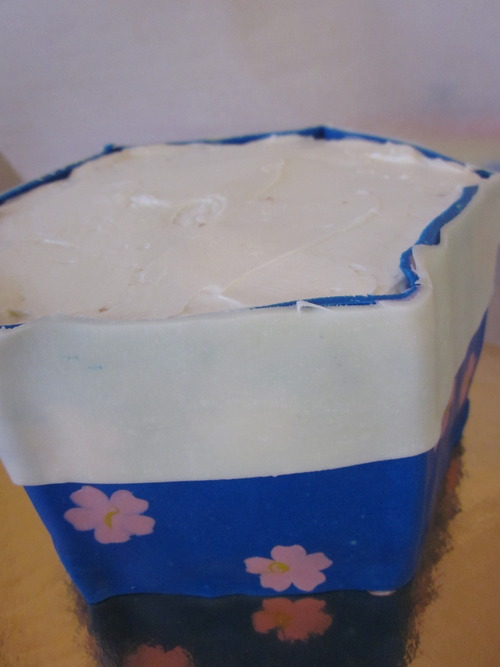
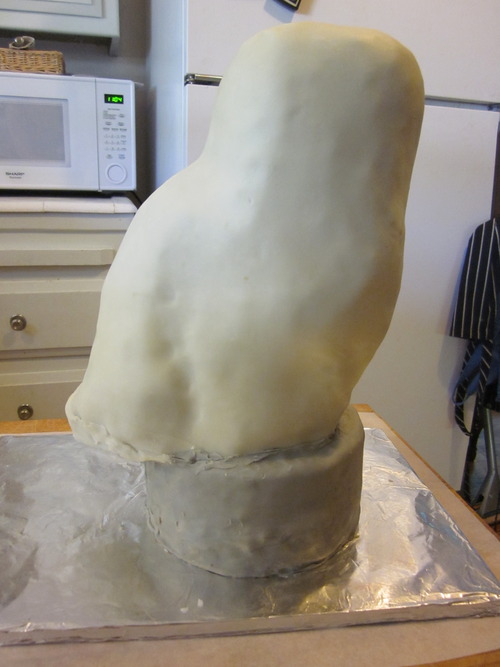
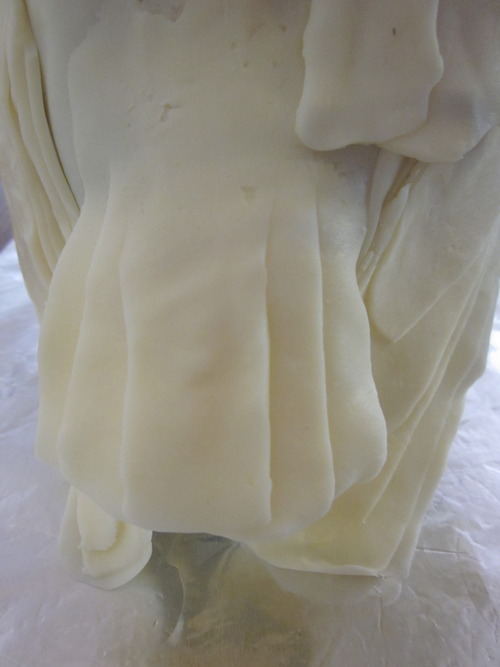
Color your modeling chocolate whatever color you want the pot to be. I chose blue. One, because it’s pretty, and, two, because I was tired of making terra cotta colored pots. Measure how long you’ll need to roll it by taking a piece of string and laying it around the base of the cake, make it big enough that you can see it all around when looking at the cake from above. Also measure how tall the cake is. Now, roll it out! Make sure to leave yourself ample wiggle room on this. An inch or so on top is a good amount. When I did that, after several frustrating mishaps, I found that rolling it sandwiched between two pieces of saran wrap worked well. Peel off the saran wrap from one side, the one with the more imperfections and wrinkles, and then cut a straight line on one of the long sides, cutting off just enough to make it straight. This is going to be the side that goes down, the bottom edge of your pot. Next, just carefully press the sheet of modeling chocolate to the side of the cake, wrapping it around. After that’s in place, cut off your extra from the side neatly, so that your seam doesn’t look too messy. Trim the top off evenly, still leaving at much as you can, and then fold it over to create a rim. At this point, it should look vaguely like this.
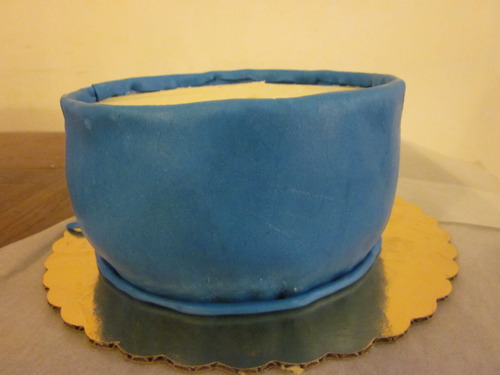
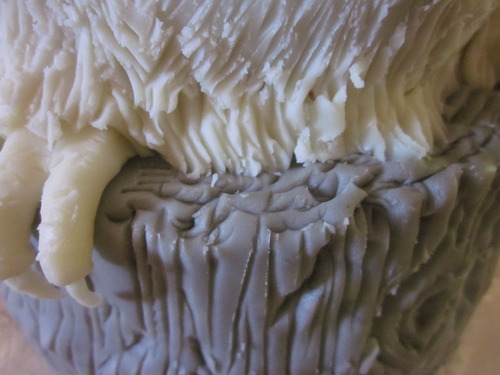
I had the smallest bit of extra modelling chocolate, so I made a ring around the base to cover up the seam. It was at this point that I realized that I had run out of modelling chocolate to cover the top. So… I improvised. What tastes delicious and looks sort of like rocks? Chocolate, of course!
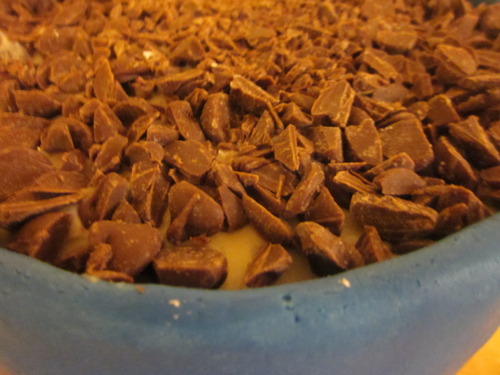
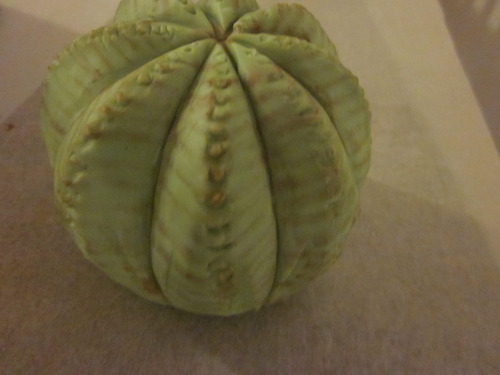
I just chopped up a couple of handfuls of milk chocolate chips and scattered them on top. Now, the succulent (still not a cactus) goes on top.
Of course, the rocks still kind of look like chocolate chips, so there needs to be more decorating… and sugar. Obviously.
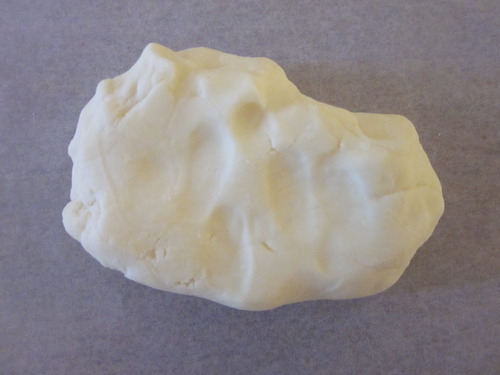
I just took out a piece of gumpaste and left it out to dry (I’d done this the night before). As it hardens, it gets all rough-looking when you cut it up, with jagged edges, which, once you color it, makes it look like rocks, which, for some reason, people seem to go gaga over.
I just took out a piece of gumpaste and left it out to dry (I’d done this the night before). As it hardens, it gets all rough-looking when you cut it up, with jagged edges, which, once you color it, makes it look like rocks, which, for some reason, people seem to go gaga over.
I did a few varying colors and and arrange them on top. And then, finally… it was finished!
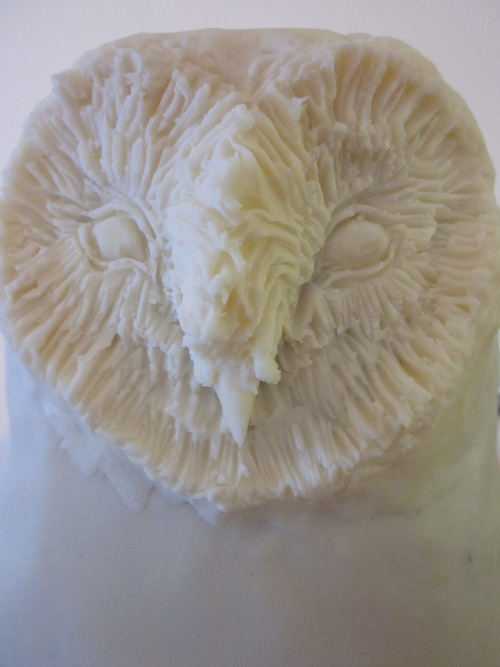
Feast your eyes (literally?) upon the succulent (still not a cactus) cake!
Feast your eyes (literally?) upon the succulent (still not a cactus) cake!
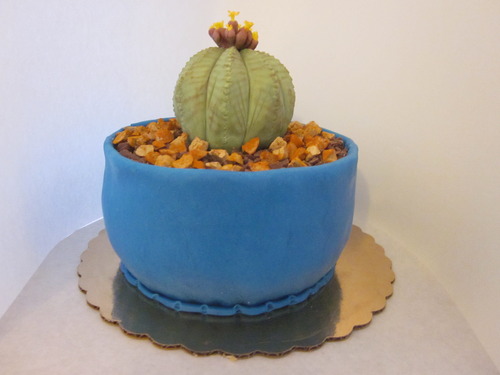


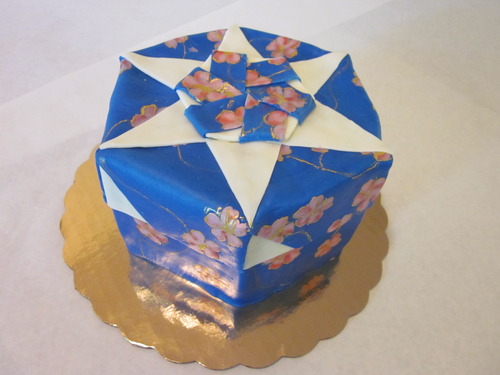
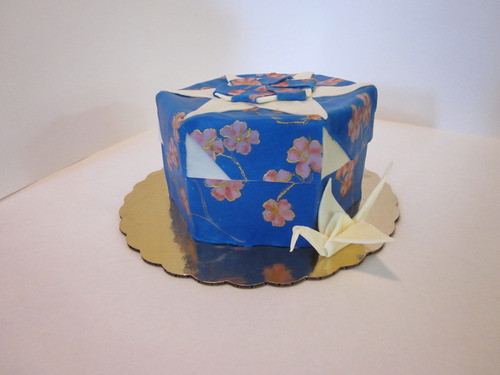
There’s the final product, a Euphorbia Obesa made out of sugar. I’m happy to say that Mr. E liked it. A lot. I really do love cake, and now that this one’s done… I’m going to make a friend’s birthday cake. I’m thinking origami themed. You know, if I can figure out how to do origami that’s edible and actually tastes good.
Anyway, let me know if you guys (if anyone actually reads this long, long thing) liked the cake.
Anyway, let me know if you guys (if anyone actually reads this long, long thing) liked the cake.


 RSS Feed