
My brother’s birthday was recently, and I decided to make him a cake. Now, that’s nothing unusual in itself, but… I think the cake be.
Has anyone seen Owls of Ga'hoole? That’s sort of what this reminds me of, but, you know… Just with less blood-purity and superior races and more chocolate.
Right. Moving on.
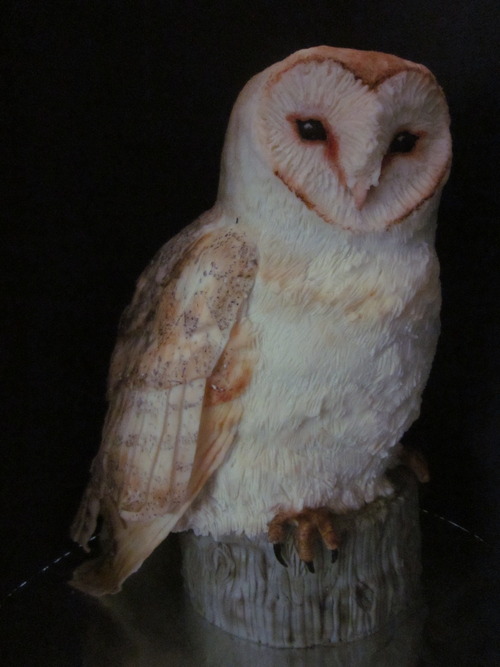
My brother, as far as I can see, has three great obsession in his life: Succulents, birds, and, most recently, rock climbing. So, I decided to make him a Barn owl cake, which just happens to be one of his (and my) favorite birds. It only took me like… three days, which is the most I’ve ever spent on a cake, but I think it was worth it. It’s my favorite cake that I’ve ever made.
It only took… Three batches of this cake recipe, a batch of chocolate ganache icing, and three 12 oz batches of white modelling chocolate.
I recommend making an extra batch of the chocolate ganache, as I was literally scraping the bottom of the bowl, trying to get every bit I could out. And… it might not be a horrible idea to make a fourth batch of the modelling chocolate. That’s right, a fourth batch.
Also, for the cake recipe, I didn’t use creme de casis, since my brother doesn’t really like it, but I used creme de cacao in the batch I doubled and kahlua in the other. Kahlua wins. Out of every liqueur I’ve used in this cake recipe so far, it’s the best… and the cheapest.
Has anyone seen Owls of Ga'hoole? That’s sort of what this reminds me of, but, you know… Just with less blood-purity and superior races and more chocolate.
Right. Moving on.
My brother, as far as I can see, has three great obsession in his life: Succulents, birds, and, most recently, rock climbing. So, I decided to make him a Barn owl cake, which just happens to be one of his (and my) favorite birds. It only took me like… three days, which is the most I’ve ever spent on a cake, but I think it was worth it. It’s my favorite cake that I’ve ever made.
It only took… Three batches of this cake recipe, a batch of chocolate ganache icing, and three 12 oz batches of white modelling chocolate.
I recommend making an extra batch of the chocolate ganache, as I was literally scraping the bottom of the bowl, trying to get every bit I could out. And… it might not be a horrible idea to make a fourth batch of the modelling chocolate. That’s right, a fourth batch.
Also, for the cake recipe, I didn’t use creme de casis, since my brother doesn’t really like it, but I used creme de cacao in the batch I doubled and kahlua in the other. Kahlua wins. Out of every liqueur I’ve used in this cake recipe so far, it’s the best… and the cheapest.
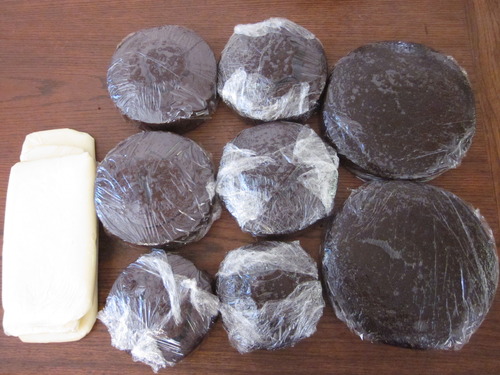
I made two eight inch cakes, four six inch cakes, and two five inch cakes.
Once I had my cakes baked, it was time to enlist some help. I’m not good with carpentry. Or tools. Or anything like that at all. The one time I tried to make a picture frame, I wound up sawing my finger instead of the wood, and the only mechanical thing that I’ve ever built was a catapult made out of pencils and rubber bands. Needless to say, I asked someone else to build the cake base for me.
Once I had my cakes baked, it was time to enlist some help. I’m not good with carpentry. Or tools. Or anything like that at all. The one time I tried to make a picture frame, I wound up sawing my finger instead of the wood, and the only mechanical thing that I’ve ever built was a catapult made out of pencils and rubber bands. Needless to say, I asked someone else to build the cake base for me.
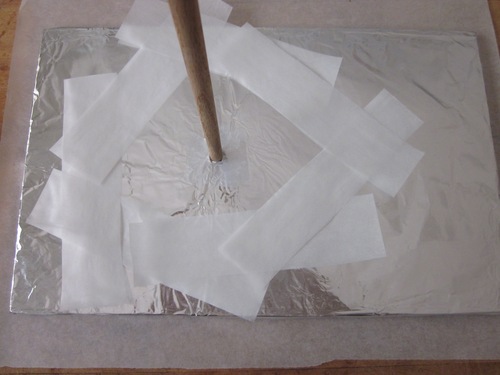
This is just a board with a dowel, which you have to make sure is shorter than your cake is going to be, screwed into it, covered with foil, and then parchment strips laid in a rough outline of the cake. Make the dowel a good inch or two shorter than your cake is going to be because the cake is going to settle, AKA get shorter, and if the dowel is too long… it’s going to poke out the top of the cake. Yep. I speak from experience.
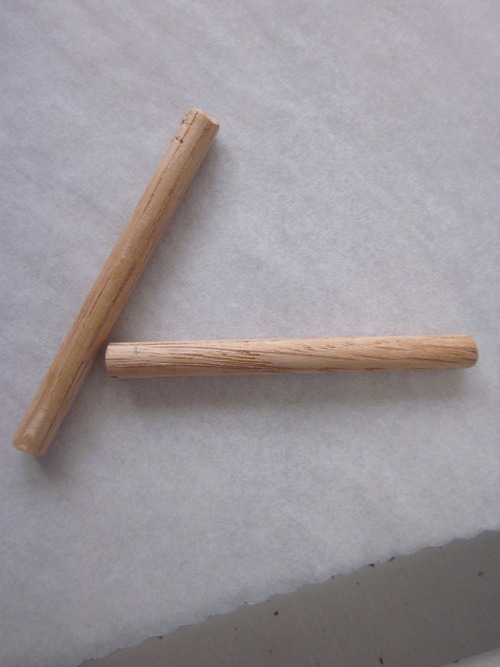
Cut three sections of dowel that are slightly shorter than two of your six inch cakes stacked on top of each other, after they’ve been leveled.
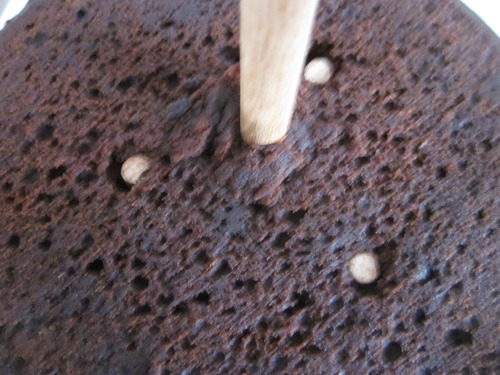
Push the two cakes onto the dowel and then push the three smaller dowels into a small triangle through the cakes.
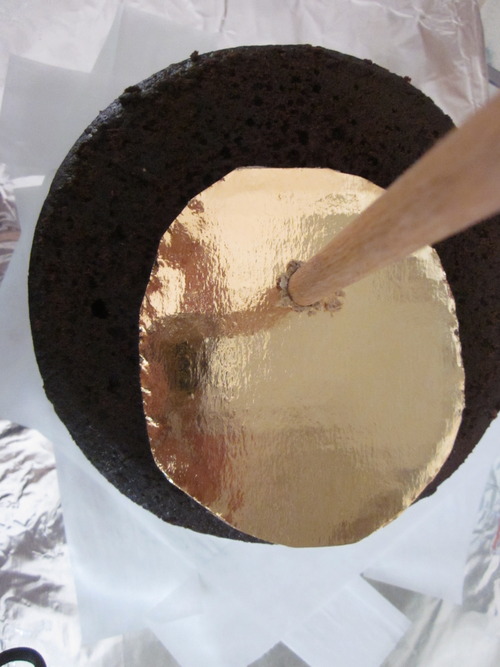
Cut an oval of food grade cardboard into an oval like so, fitting it over the dowel and letting it go to the edge. That’s going to be where the tail of the owl will be.
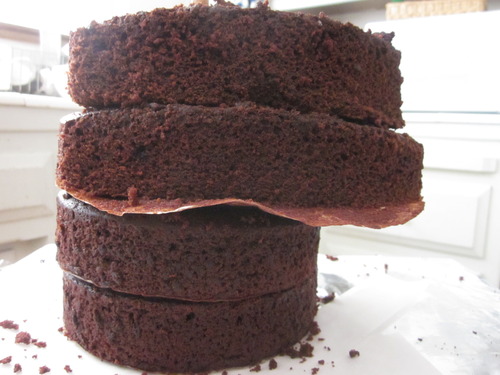
Then, the eight inch cakes are stacked on. I cut them so that they’re longer in the back, to for the butt and tail, and smaller on the other sides. These layers are going to be the base of the owl.
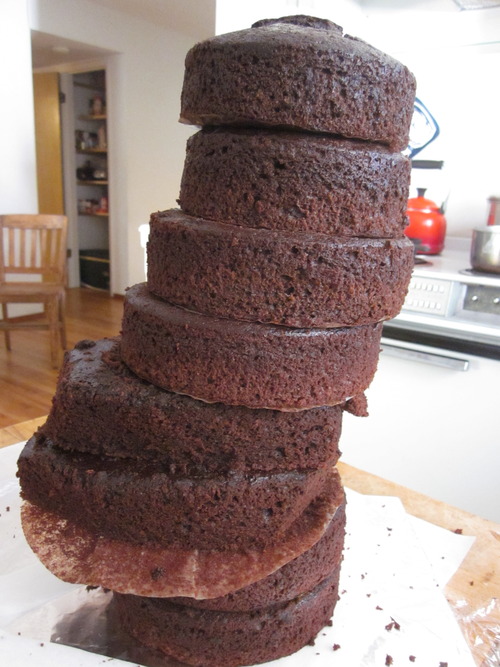
Aaaaand… Keep stacking! Add the two other 6 inch cakes, putting them off center, so the cake sort of curves, and top the structure with the two five inch cakes.
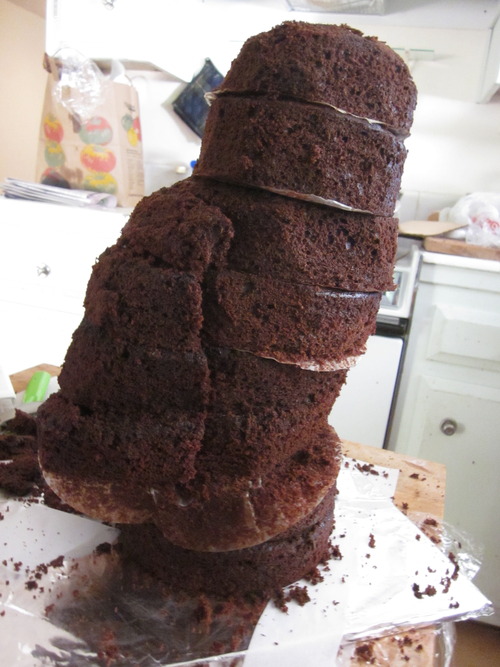
Carve it until it loosely resembles an owl. Keep checking with a reference picture to make sure that the shape looks right. It’s best to do this with a sharp, serrated knife. Like a bread knife. Now, as you can see, I still have the parchment on the cakes. I leave it while I’m arranging everything because it makes it less likely that a cake piece is going to break.

Here’s the whole thing reassembled with the parchment removed and chocolate ganache in its place. I used some cake scraps and stuck them on with ganache where I needed to change the shape.
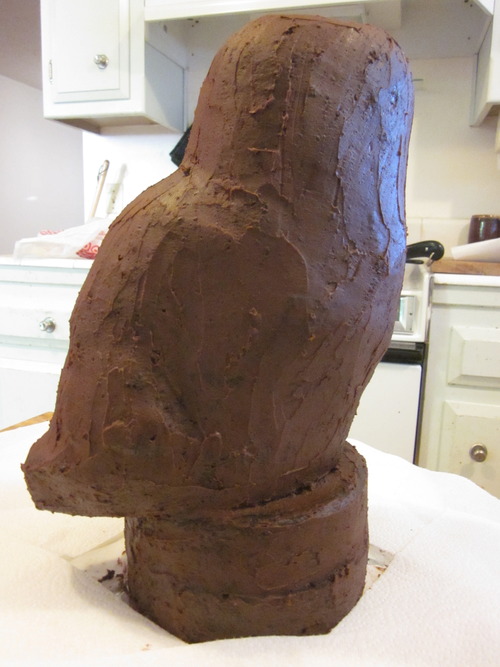
This is what it looks like after coating the entire cake in a thin layer of chocolate ganache. Try to get it as smooth as possible. At this point, it looks rather like a very bad carving of a big-headed chicken. I swear it will get better. Chill it in the fridge.
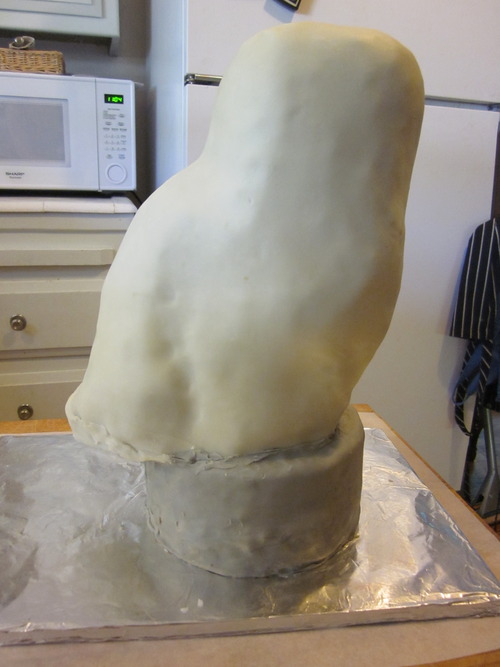
Roll out a big piece of the white modelling chocolate and cover the cake, starting at the front so that it’s smooth. I used a brown/grey tinted covering for the base, which will be the stump. Now, due to the fact that the cake is a weird, uneven shape…
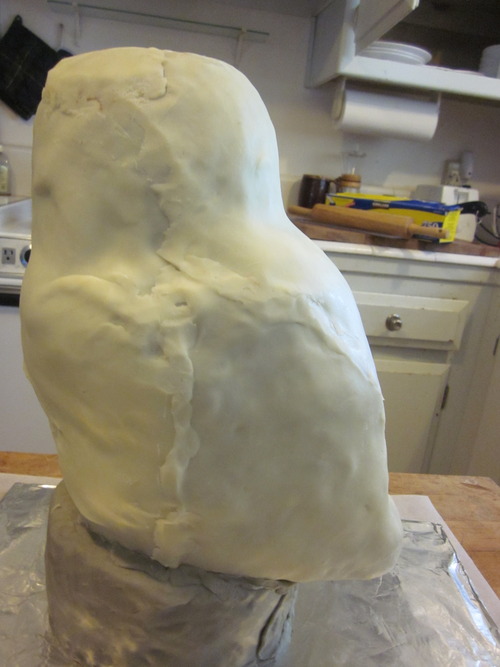
… The back of the cake isn’t nearly so pretty looking. In fact, it more resembles Frankenstein’s monster. Just try and make it as neat and smooth as you can.
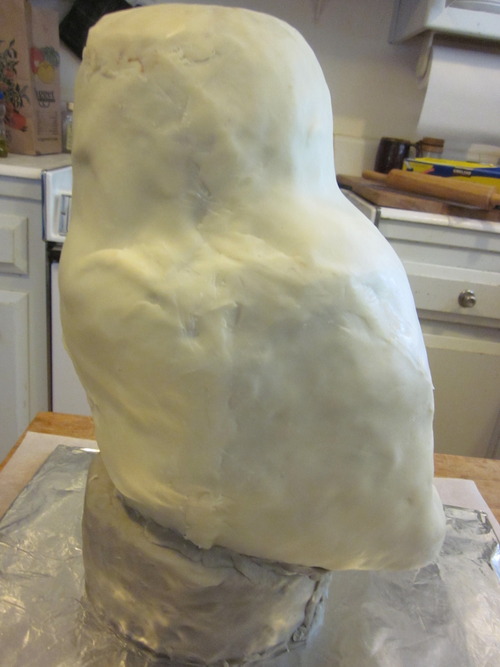
It looks a little better after smoothing it down. Taking the flat blade of a knife, after warming it in hot water, works really well to smooth the joins.
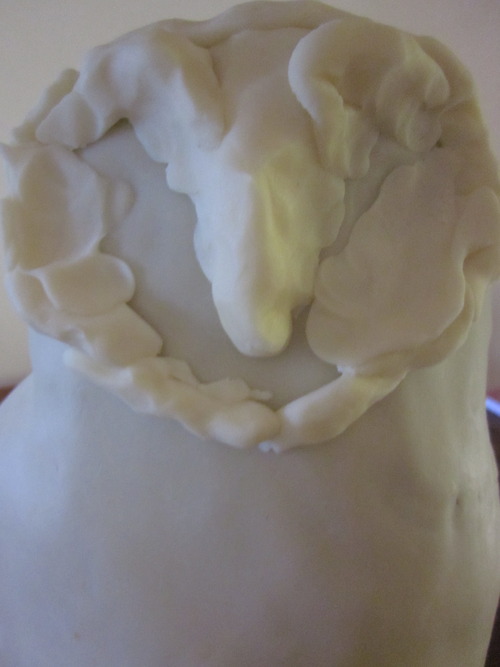
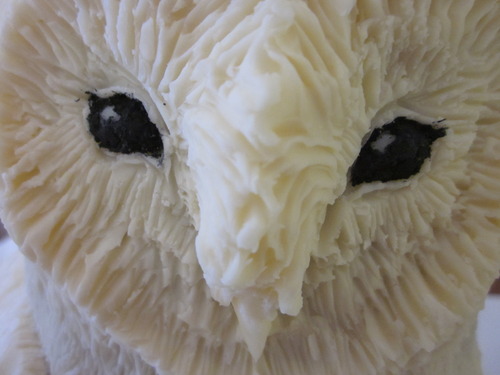
Time to start on one of the most important aspects of this cake. The face. A barn owl’s eye are deep-set, so I had to add quite a bit of modelling chocolate to build the features. Keep adding chocolate until the depth looks right.

Then start working in the details, like the eyes and the beak.
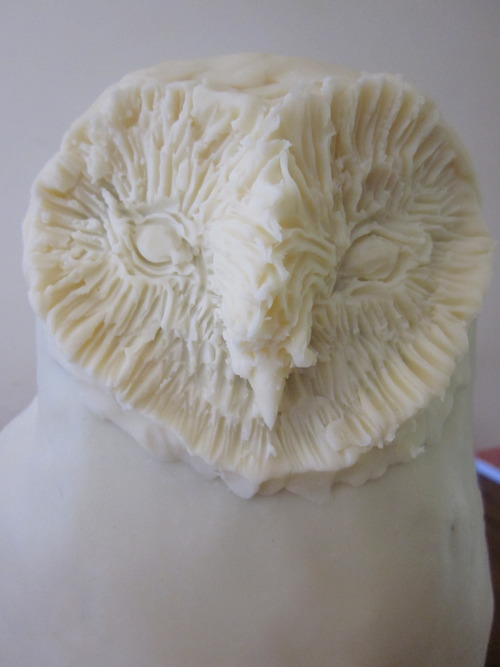
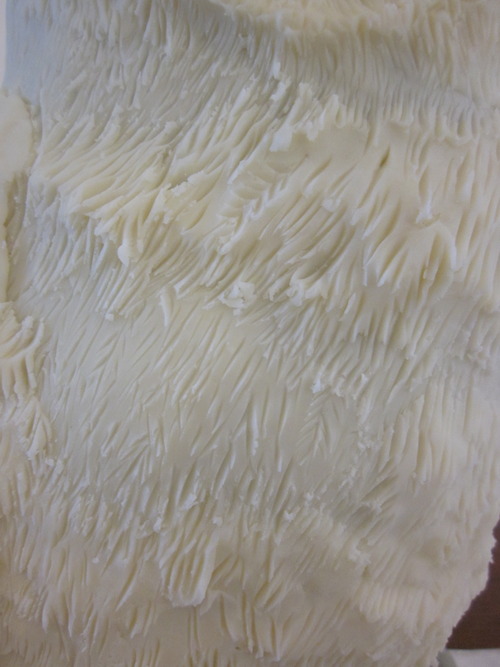
See? This is what it looked like after some more carving. Make sure to give it a lot of text to simulate the feathers. And pay special attention to the direction that they go.
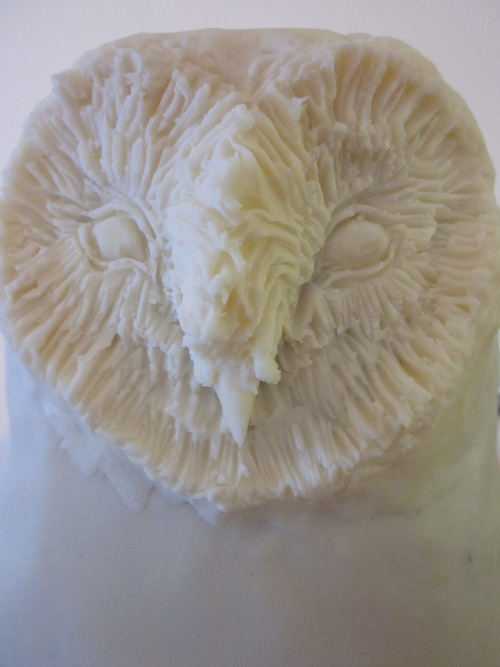
Ta dah!
Onto the chest! Add some modelling chocolate where you want it to be extra fluffy, but make sure you mark the entire chest.
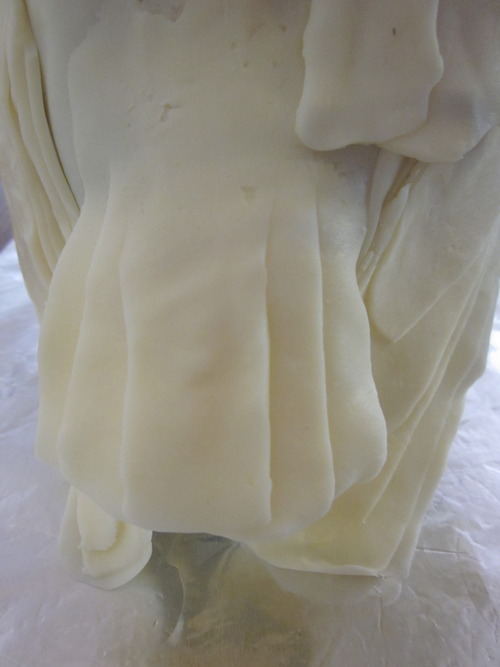
And… I sort of skipped photographing a few steps, so… Yeah. Sorry. I got distracted. Anyway, the tail is just five overlapping pieces of the modelling chocolate that was secured to the butt of the owl.
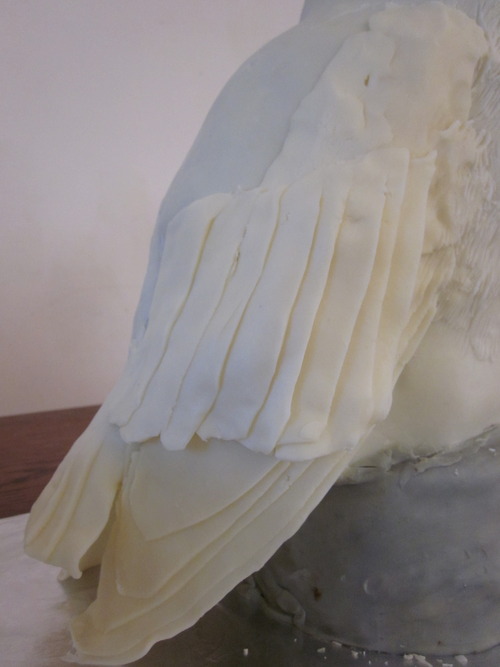
How the wings look are going to vary with the picture of the owl that the cake is being based on, but, for this one, I just layered five pieces of the modelling chocolate, after cutting them into the right shape, and layered more pieces over that, as seen in the picture. What’s very important here is looking at your picture. LOOK AT IT! And then try to copy it. Remember, you’re going to have to make the wings twice basically, once for each side.
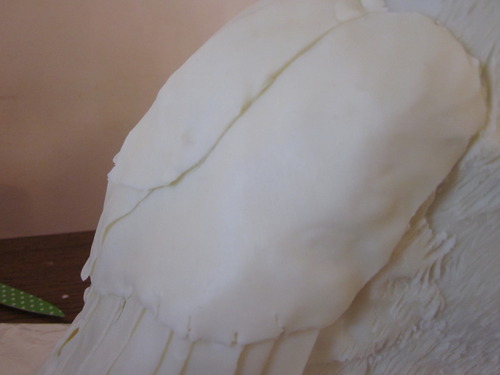
Once again copying the picture to the best of my ability, I laid down a piece that went all the way across the back, covering any seams from the additions of the other feathers, and then added a central piece in the middle of that, which sort of looks like a flat little hood hanging down. I also gave them semi-scalloped edges, to mimic feathers.
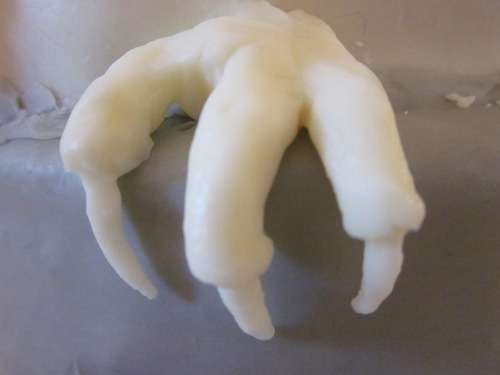
And don’t forget to make the talons, attaching them securely to the body. Take a bit of the white modelling chocolate and put it around the join, using the extra material to make it look super fluffy.

Draw feather-like markings on the modelling chocolate.
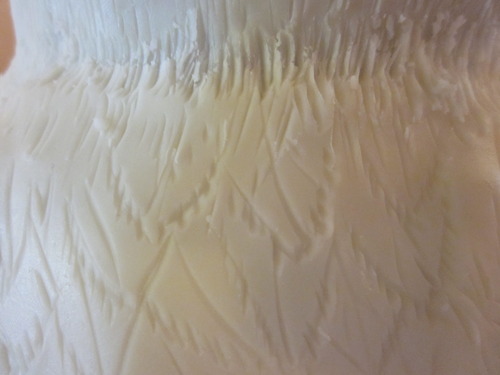
And more feather markings. Actually, make sure you feather or fuzz everything.

And more feather markings. I serrated the front edge of the feathers that hang straight down to copy the real thing. Apparently, that’s what makes them fly so silently.

Don’t forget to add texture to the post that the owl is sitting on. I found a couple of pictures of weathered posts online and used those as inspiration.
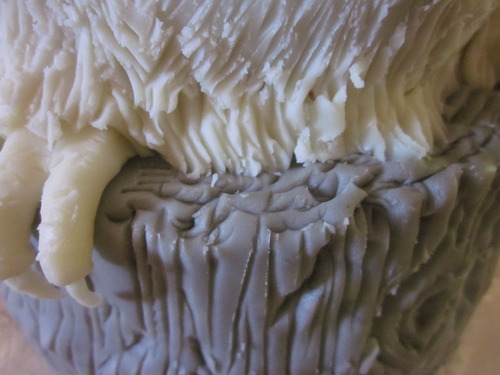
Make sure you do the top of the stump/post/log thing, too, and use more modelling chocolate to blend out the fuzz from the owl into the post slightly.
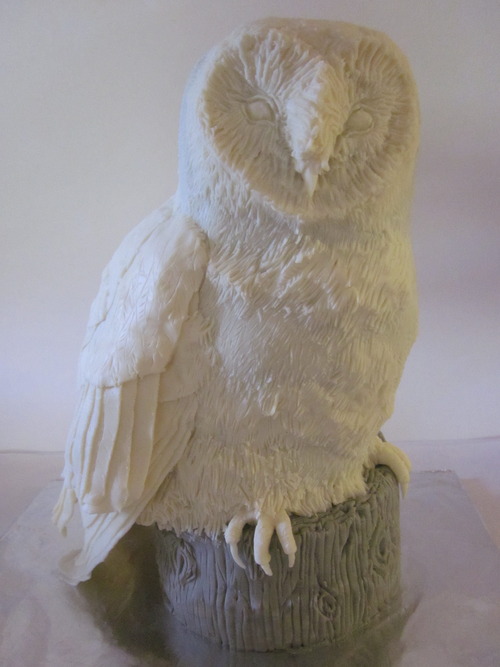
And here’s what it should looks like. Vaguely. I rather like it like this. It looks like a statue. But now… It’s time for a paint job.
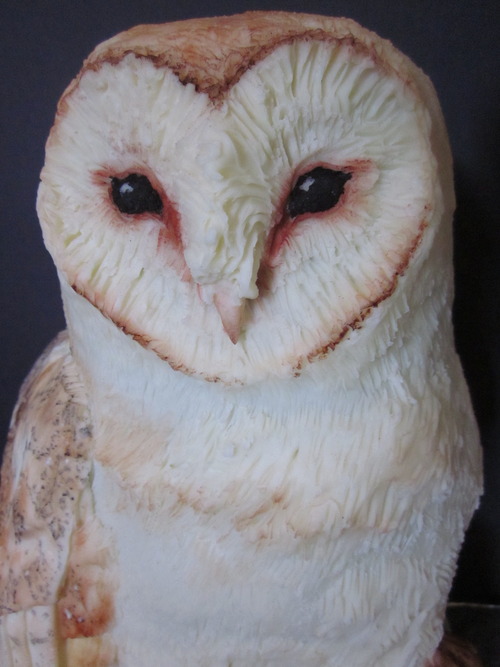
I added black food dye to some melted white chocolate and painted it on the eyes, making sure to leave some white so the eye looks like it’s gleaming.

After that, I painted a mix of red, brown, and orange powdered food coloring around the eyes and then down alongside the poofed out feathers and beak. It sort of looks like it’s crying blood, but this is actually what they look like.
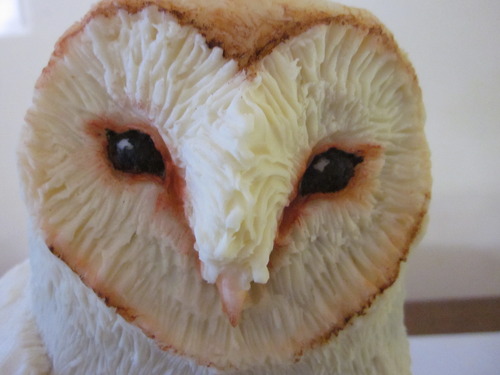
Then I painted the beak a pale pink, making it slightly darker towards the tip. Oddly enough, I think the beak might be my favorite part of this entire cake. It’s just so cute! Not weird. Not weird at all.
The paint job is going to vary, depending on the bird that you’re using as a model. They vary in pattern and coloration hugely. I used a mixture of brown, orange, and yellow powdered food coloring, mixing a small amount of water in with the brown to form a paste to get the dark brown seen on the edges.
The paint job is going to vary, depending on the bird that you’re using as a model. They vary in pattern and coloration hugely. I used a mixture of brown, orange, and yellow powdered food coloring, mixing a small amount of water in with the brown to form a paste to get the dark brown seen on the edges.
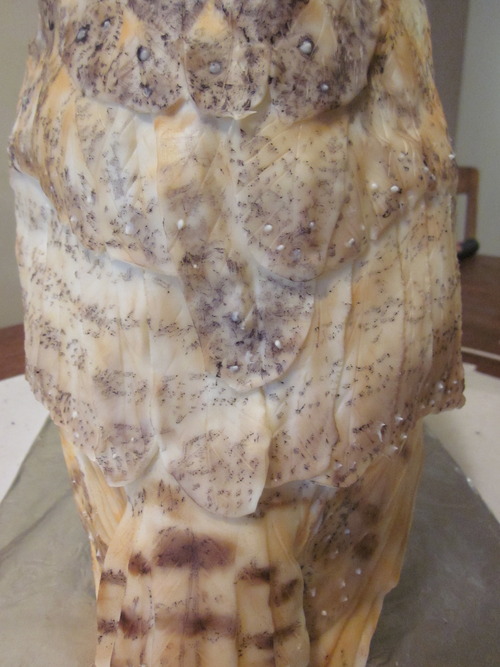
Using more of the dry food coloring and paint the patterns on the wings.
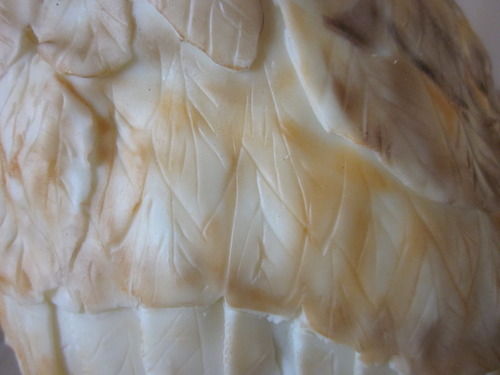
After that, you can start to apply a darker brown.
To add the dots, just I just mixed the black food coloring powder with a little water and dotted it on with a brush.
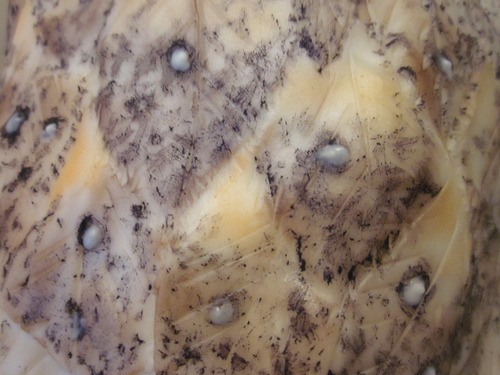
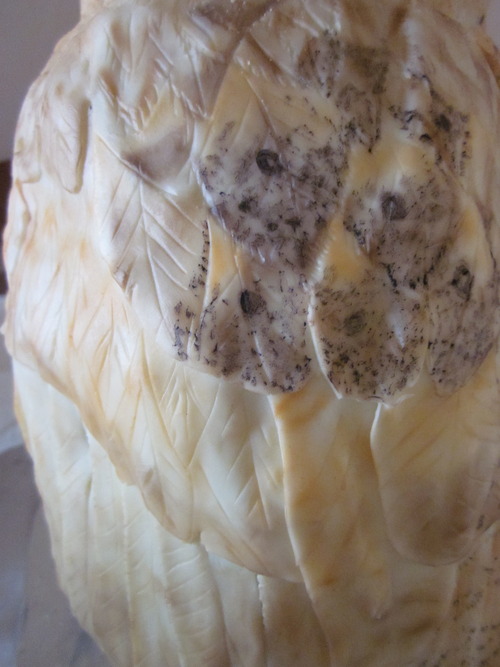
Finally, I added some white melted chocolate to give it white spots.
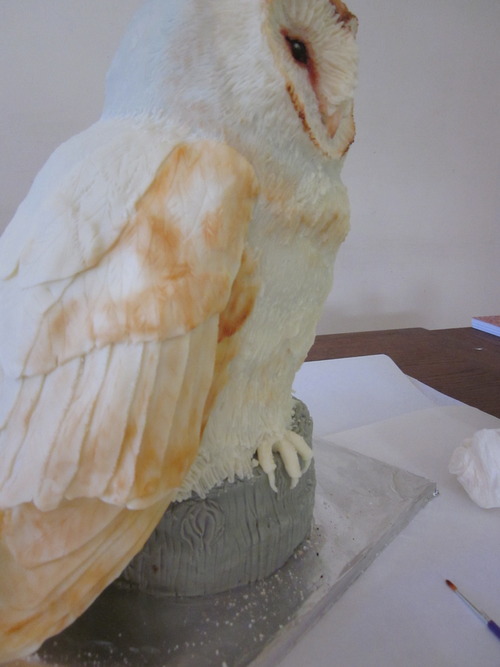
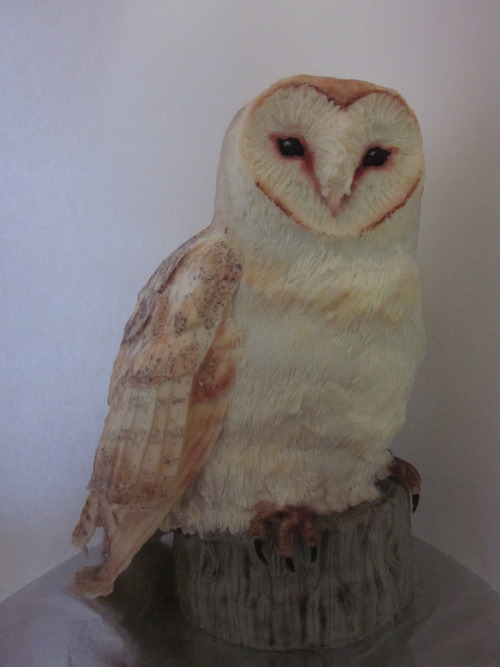
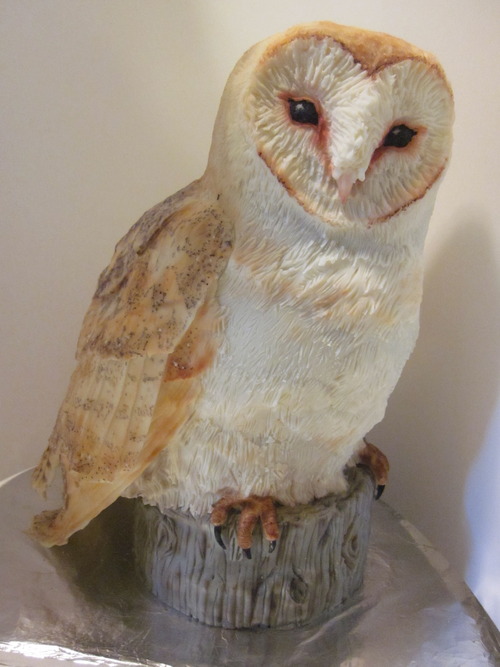
And this is how the paint job looked in the end! It only took me… far too long.

I used brown powder on the feet and water and black food coloring on the talons themselves.
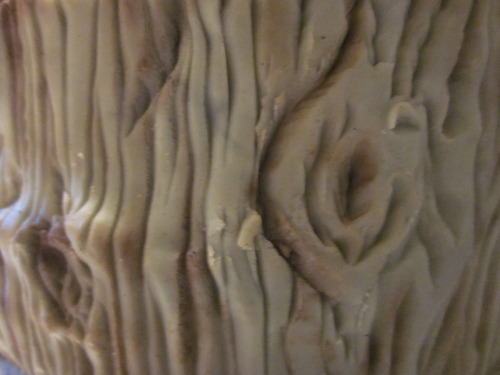
I also added some brown food coloring to the post, taking a brush and emphasizing the texture by running the brush in the “cracks”.
And so… There you have it.
And so… There you have it.
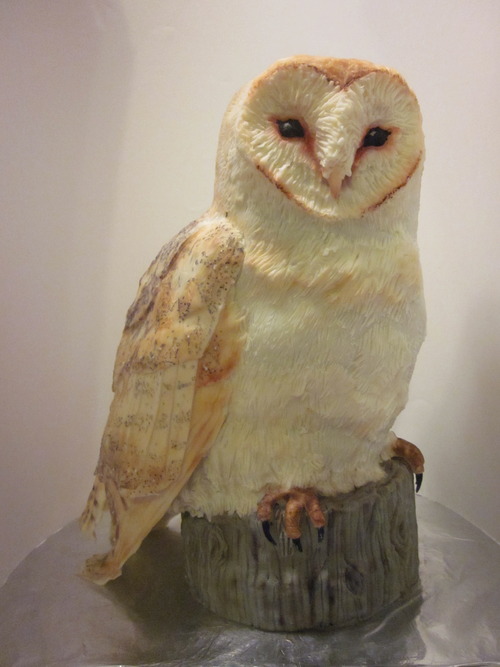
Alright. I’m done spamming this post with owl pictures.
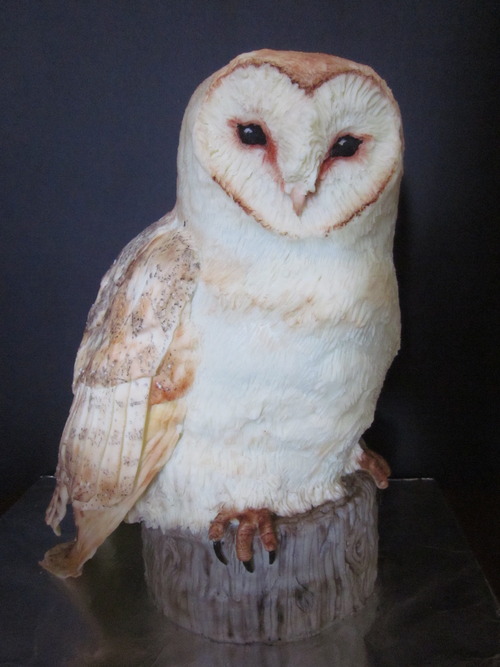
Okay, now I am. I swear. Well… Just one more.

There. Sorry. I’m just sort of ridiculously in love with this cake. She’s so cute! And so real looking. Yeah… I started talking to it at one point. Because I talk to the things I cook sometimes, which is totally normal. My mother started laughing. Meh.
Aaaaanyway, I really hope that you enjoyed this far, far too long tutorial, and, if you did, please leave a comment and let me know!
Aaaaanyway, I really hope that you enjoyed this far, far too long tutorial, and, if you did, please leave a comment and let me know!
 RSS Feed