

I seem to be making cakes for birthdays a week late. Consistently. But, somehow, the recipients of said cakes don’t seem to mind.
Last quarter I met a girl in biology lab and we bonded over our mutual dislike (I could use another word here, but dislike is politer) of biology. I’ve heard that the surest way to bring two people together is hatred of a third. That proved extremely accurate in this case.
It was her birthday last week, so I decided, because I had no idea what to get her, and also because I just really like making cakes, that I would make her a cake. She told me I didn’t have to. I told her I knew that but I was going to anyway.
After deciding that I was going to make her a cake, I had to decide on a theme. What does she like? Origami. And tea. Great! Let’s make a tea flavored origami box cake! Because, to my brain, that just somehow makes sense, despite the fact I’ve never seen an origami cake or that I never made a tea flavored cake.
So, this was my attempt to make a (hopefully) awesome cake for a really cool girl. Happy (late) birthday.
Aaand… All of that led to this:
*Cue me searching online on how to make edible origami and then rejecting all methods I find*
The whole process was actually simpler than I imagined. For the cake itself, I used this Earl Grey Tea cupcake Recipe.
For the icing, I used this modified Swiss buttercream recipe, which I just found and makes amazingly fluffy frosting. It’s probably my favorite at this point, despite the fact that I’m usually an all-butter girl, and it has just a bit of shortening in it.
But I was sort of worried that it wouldn’t have enough of a tea flavor, so I decided to add more sugar flavor by adding an Earl Grey tea sugar syrup. Despite all of this, the tea still has a subtle, gentle tea flavor.
For the outside, I used the same modelling chocolate recipe that I used in my tutorial on how to make a Euphorbia Obesa cake.
Now… Allez cuisine! I’ve been watching too much Iron chef. And we’re not really cooking so much as baking, so… Allez jouer avec du sucre! Yep. So much more accurate.

Before you even start to make the cake, you need to make the modelling chocolate the day before. Follow the recipe, and let it sit overnight.
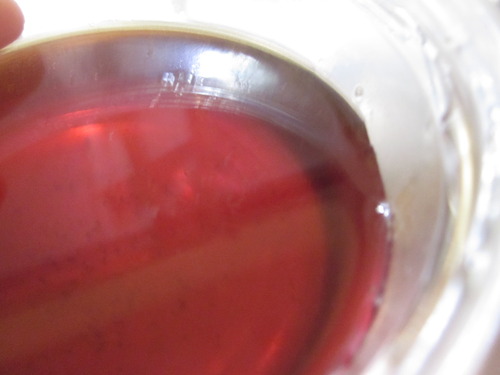
Also, don’t forget to make the syrup! I just took half a cup of sugar and half a cup of water and brought it so a boil, dissolving the sugar crystals, along with a generous amount of Earl Grey tea leaves. Then, let it cool and strain out the leaves. It turns this beautiful amber color.
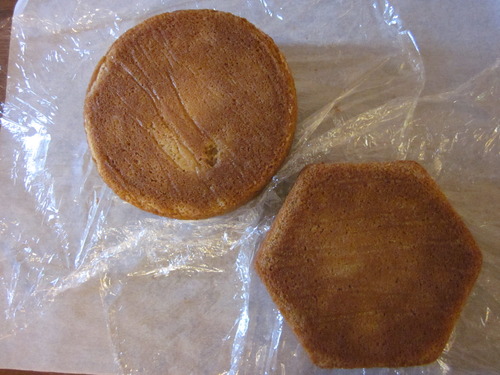
Now, you can work on the cake. After making the batter for the cake, I baked it in two pans. I had one hexagon one, which I think was roughly six inches, and a six inch round. The batter fills them up nicely, but they’re going to take a bit more time to cook than it says in the recipe. The hexagon took around 24 minutes, and the round about thirty.
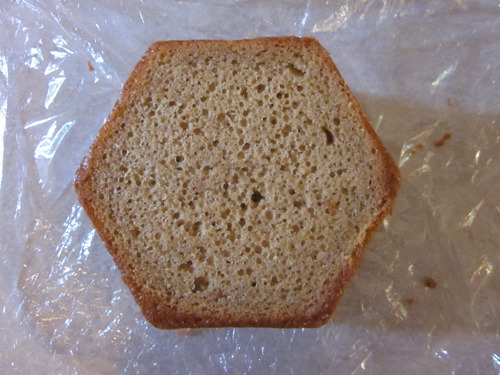
Once they’re cool, level them off so that they’ll fit together nicely. As for the scraps… Well, you do have to do a taste test, right? Quality control and all of that.
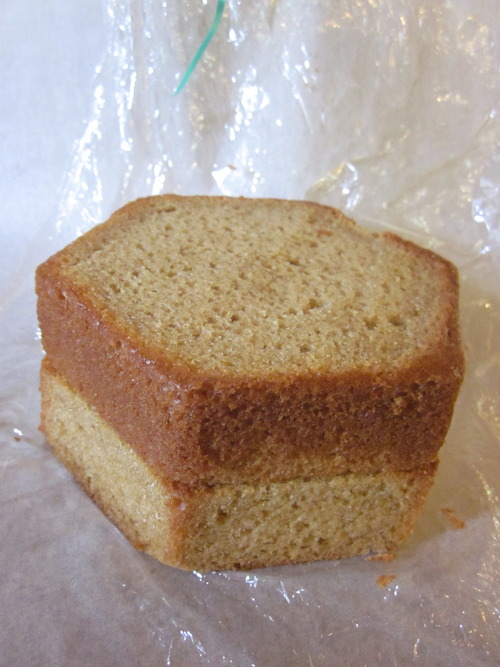
And then stack them!
Next, you need to cut the round to the same shape as the hexagon. To do this, just place the hexagon on top of the round and cut straight down along the sides. After that, I cut each layer into two, so that I had a total of four layers.
Next, you need to cut the round to the same shape as the hexagon. To do this, just place the hexagon on top of the round and cut straight down along the sides. After that, I cut each layer into two, so that I had a total of four layers.
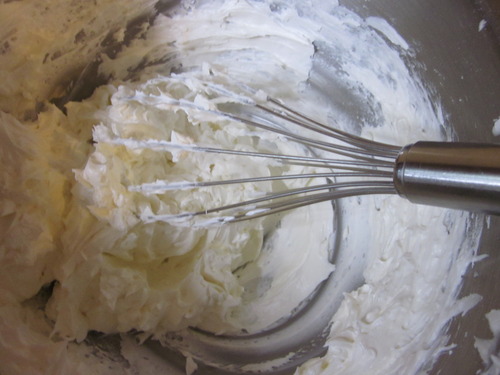
Time to make super fluffy frosting. It’s so fluffy I’m gonna die! Movie quote anyone?
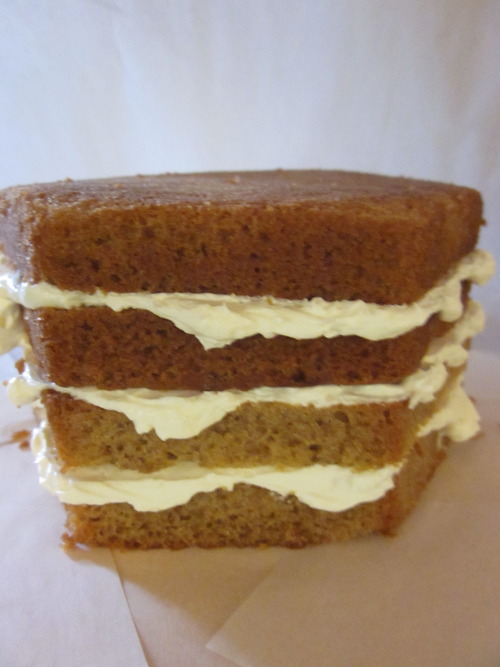
Take the syrup and drizzle it over each layer, adding enough to moisten the cake, but not to make it wet, and then cover with a generous portion of frosting. Repeat! And again! And again!!!
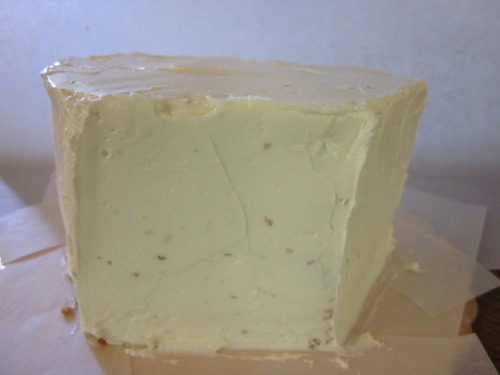
Cover the entire cake in frosting. Make sure to keep the hexagonal shape and not to round it out too much. Chill while you prepare everything else.
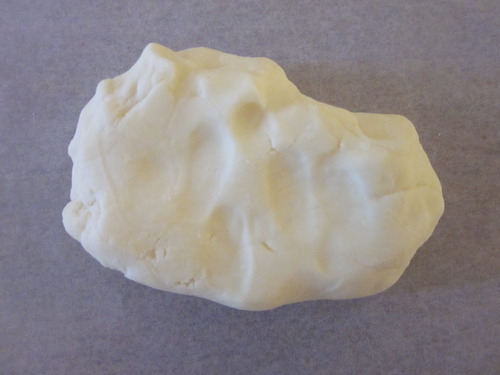
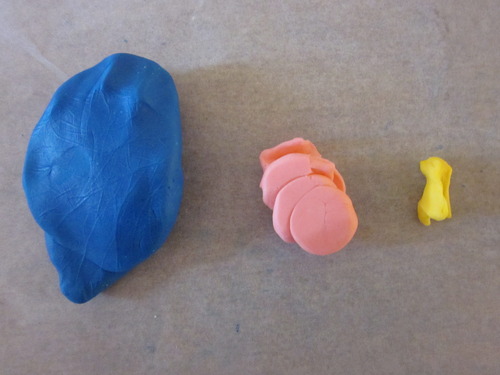
Take modelling chocolate and knead it briefly until malleable. Set aside around a quarter of it to keep white. The majority of it’s going to be colored blue, but make sure to take piece and color it pink, and then another and color it yellow. The proportions shown in the next picture are about right.
And here we go! Time to really get to work.
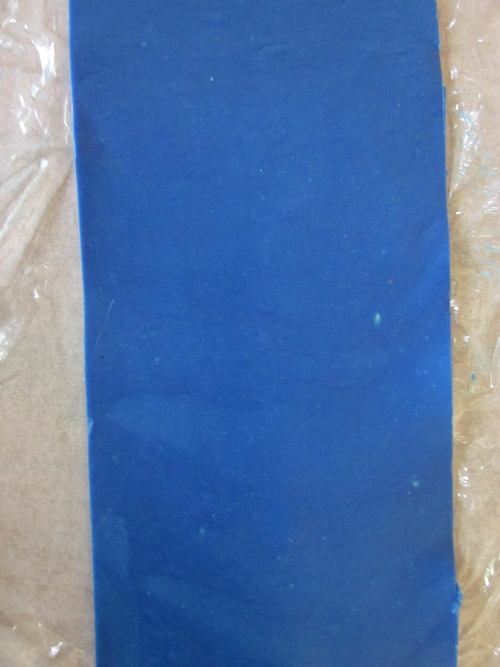
First, on top of a piece of saran wrap, roll out your blue until fairly thin, and making sure that it’s wider than the side of your cake. Leave yourself a good half inch of wiggle room. Cut the bottom in a straight line. Make sure that you have a lot of this, more than just enough for the side, because it’s going to be used on the top, too.
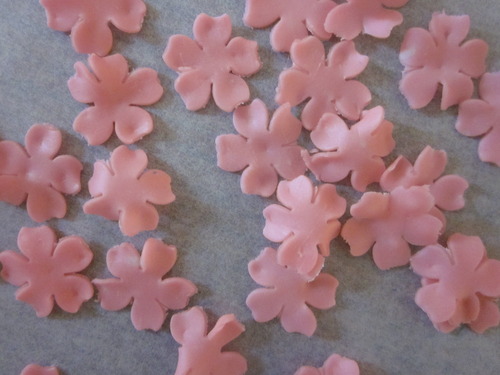
After rolling out the pink as thin as you possibly can, cut out little flower blossoms with the smallest flower cutter you have. And then repeat until you really, really don’t want to do it anymore. And then do some more. It’s really important that the chocolate is rolled thinly in this part, because otherwise they’re going to lose their shape when you roll them onto the blue.
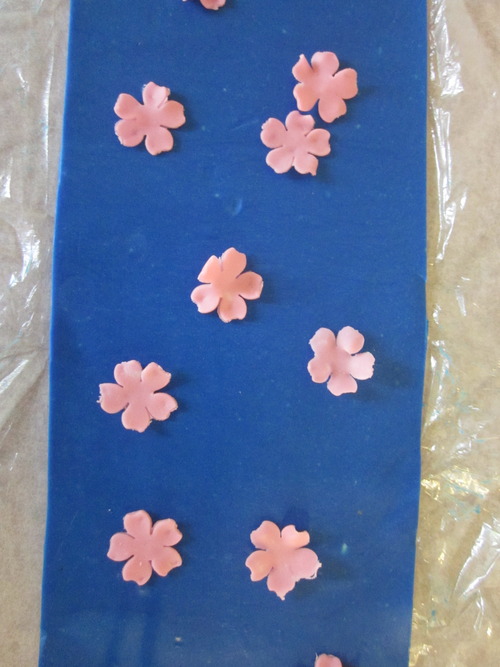
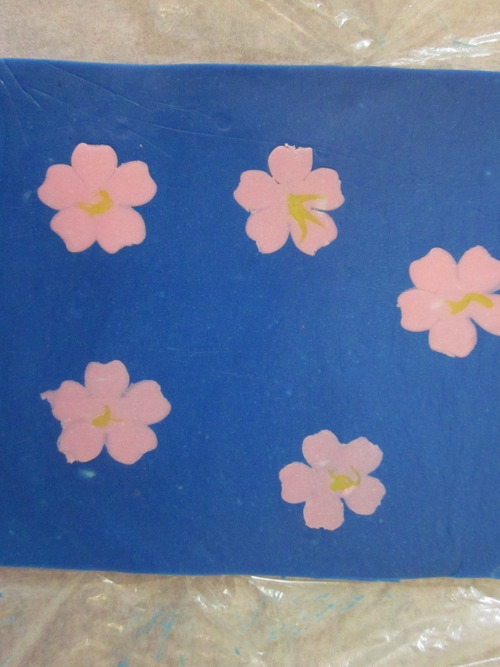
Sprinkle them randomly onto the blue.
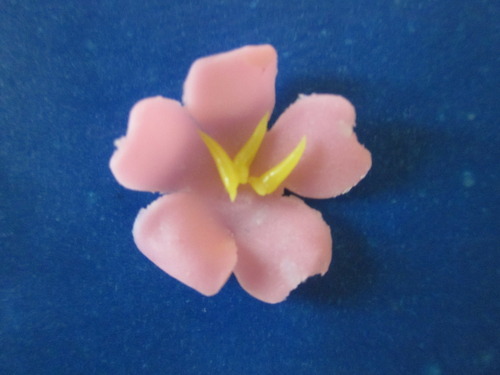
Now, just because you don’t have any biology homework, or physics homework, or a organic chemistry midterm to study for, take way too long rolling out little yellow stamen-thingies for the centers of each flower. Yeah… my time management skills are sorely lacking. I’ve heard some pretty odd ways to procrastinate. Mine is baking. I knew someone else who cleaned her toaster to procrastinate. To each their own, I suppose?
Now, take a piece of saran wrap and place it over the modelling chocolate, making sure to keep it as wrinkle-free as you can. Take your rolling pin and roll down over it super gently, just enough to merge the flowers into the blue.
Now, take a piece of saran wrap and place it over the modelling chocolate, making sure to keep it as wrinkle-free as you can. Take your rolling pin and roll down over it super gently, just enough to merge the flowers into the blue.
It should look vaguely like this.
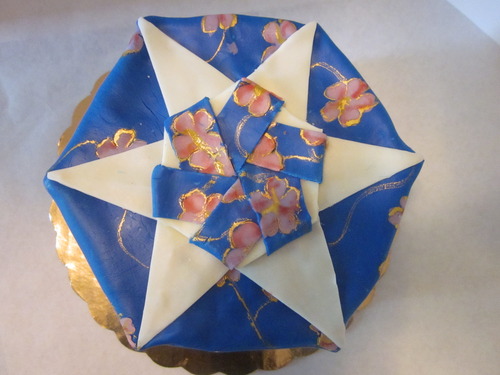
Time to cover the cake! To do this, peel off the saran wrap on the side that doesn’t have flowers and press it gently to the side of the cake. When you’ve gone all the way around it, have the seam on a corner. It’s easier to cover up that way, and make sure to make it nice and straight. A little blending with a finger should make it all but disappear. Crease the corners of the cake slightly with your fingers so that the angles and edges aren’t lost, and then trim the chocolate off of the top, cutting it almost level with the icing. Closer than what I did in the picture.
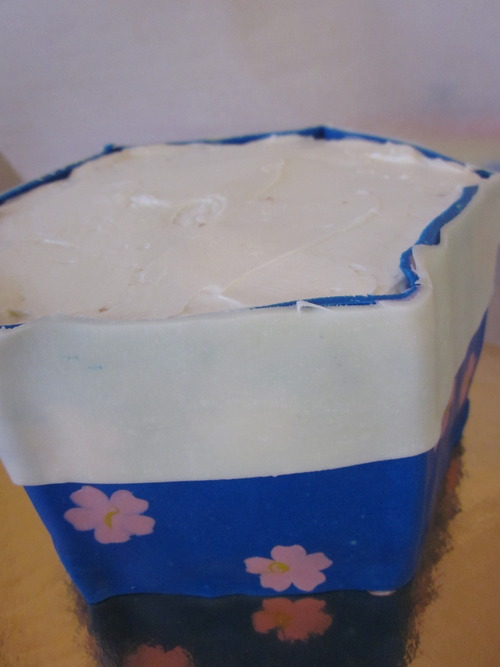
Add a strip of white the top of the cake. I think I made mine around half the height of the cake.
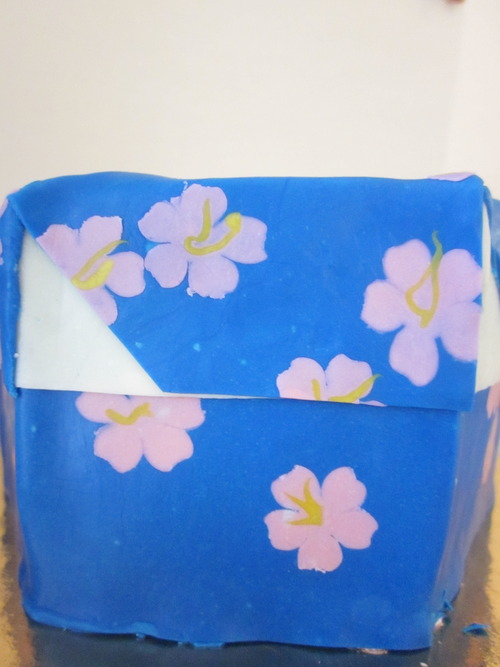
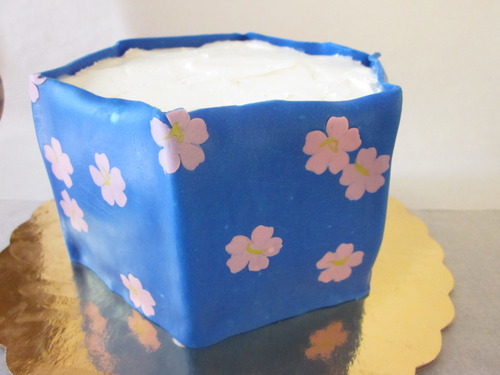
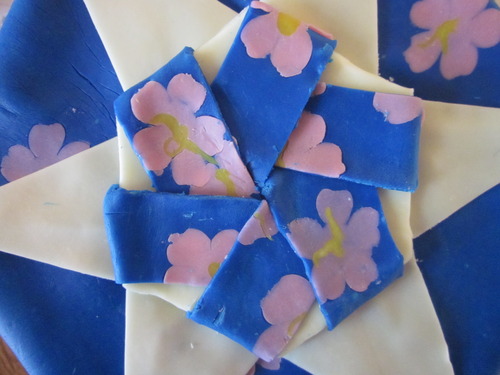
Here’s where it just gets slightly more complicated. Take a piece of the blue with flowers and cut it to fit the side of the cake with a piece overlapping on top, and with a corner to show the white underneath. I know I’m not explaining thing too well, but hopefully the two pictures above will explain. Do this for all six sides.
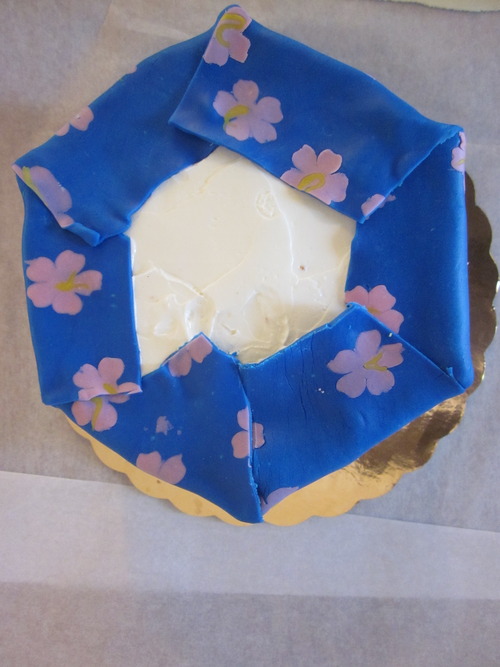
Trim the chocolate so that there’s no blue-on-blue overlap. Next, cut out white isosceles triangles (I know, I know. You thought you never needed to think about geometry again. Sorry.) and place them over the seams like so. Then, cut out a white hexagon, keeping the modelling chocolate around double the thickness of the modelling chocolate that covered the cake. Make sure that it’s big enough to cover the unsightly seams on the center.
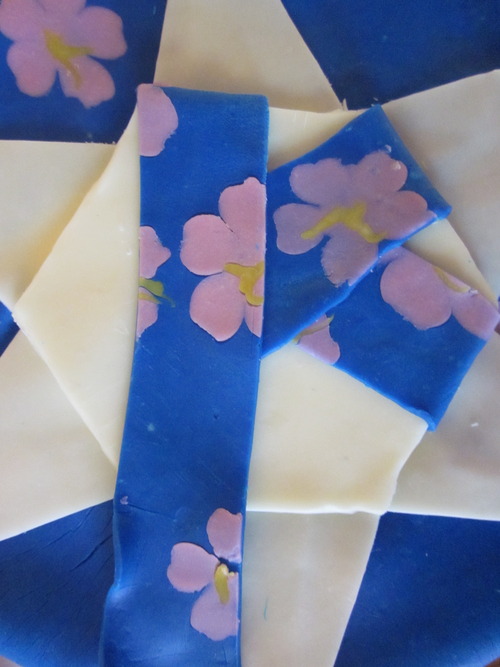
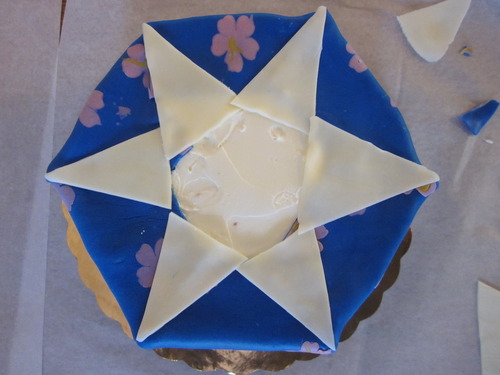
To get the paper folding look, take strips of the blue chocolate, half as wide as the sides of the hexagon, and align them so that they’re pointed towards the center of the cake, each one overlapping the last strip, and with the outer ends tucked under the white hexagon.
Congratulations! You’re finished!
Except… not really. Sorry. The main construction is done, and now it’s time for the detail work.
Except… not really. Sorry. The main construction is done, and now it’s time for the detail work.
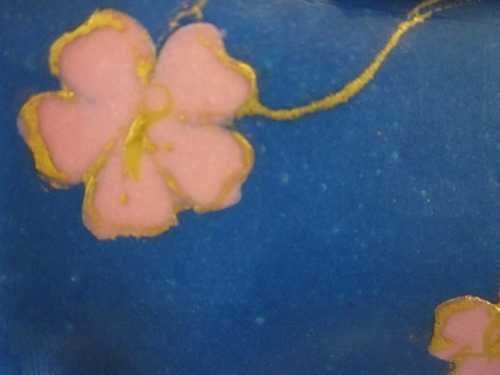
Outline the flowers with gold food-grade paint, which is available online or at some stores that carry Wilton products and draw some stems coming off of them.
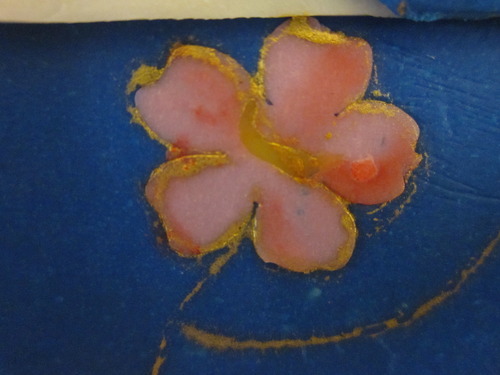
Finally, add some pink touches to the flowers with a dry brush and some red food colored touches to give depth. See how fancy it sounds? And it looks fancy, too!
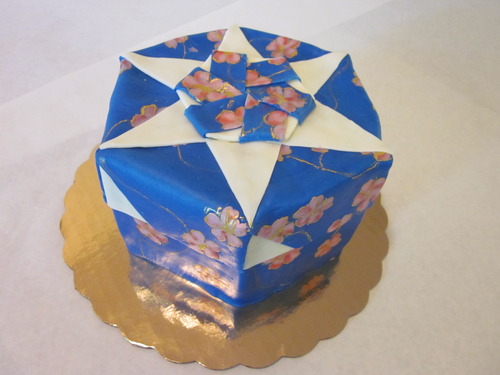
Now, ‘tis finally finished. There’s nothing more I could possibly add to make it better.
I lied. There is.
Have an edible origami crane!
I lied. There is.
Have an edible origami crane!
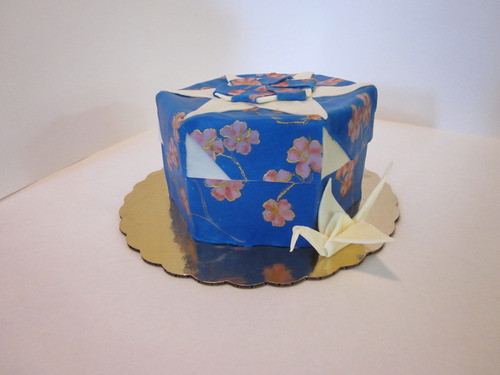
Awesome increased by 20%. Sadly, I forgot to take pictures of the process to make it, but I will post a modelling chocolate origami crane tutorial eventually.

There’s the finished product. An origami box with crane that’s all edible for a friends birthday.
I hope anyone who actually reads my food ramblings enjoyed this tutorial. And now… off to study physics.
I hope anyone who actually reads my food ramblings enjoyed this tutorial. And now… off to study physics.
 RSS Feed